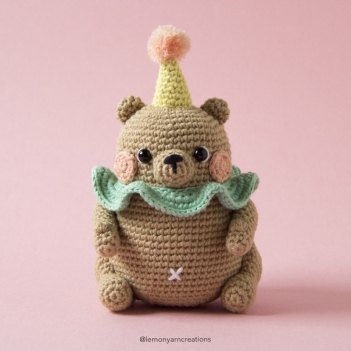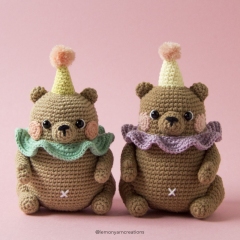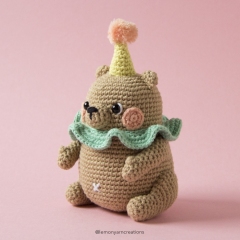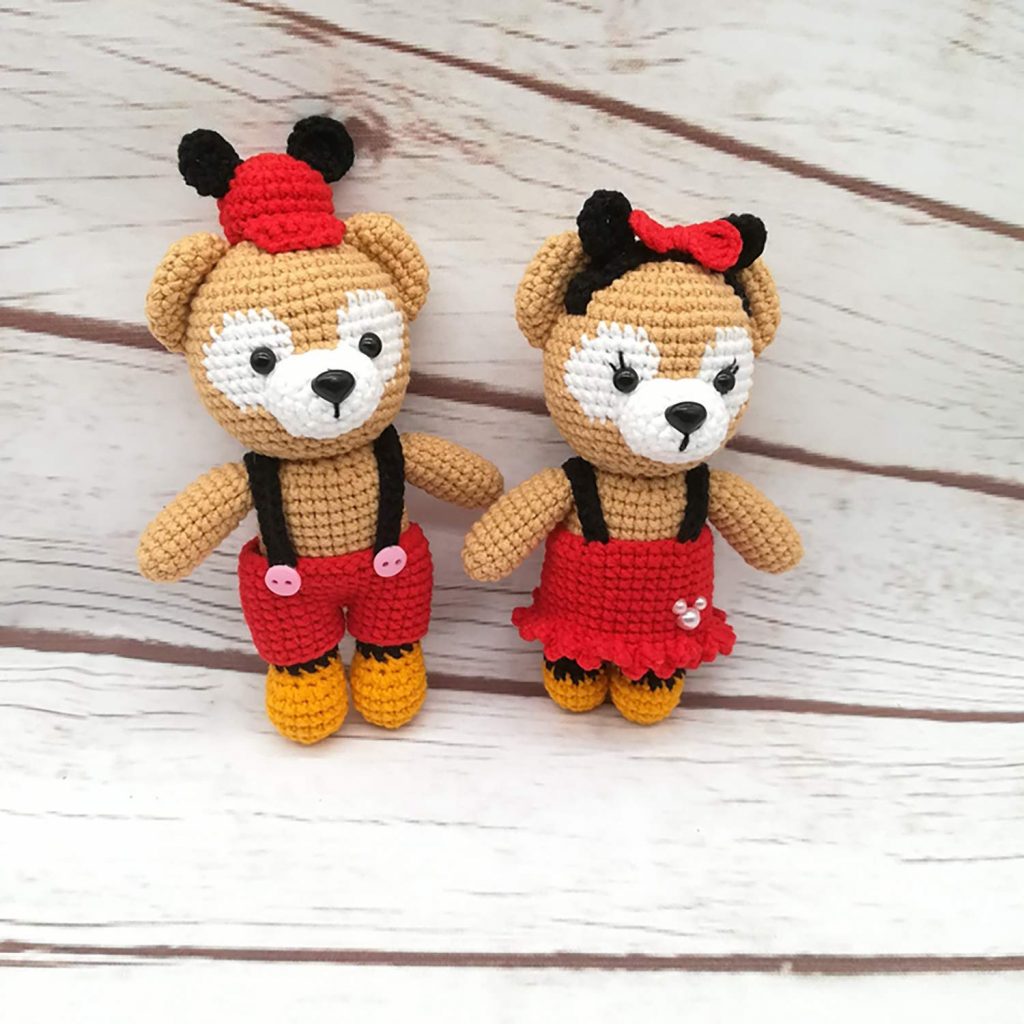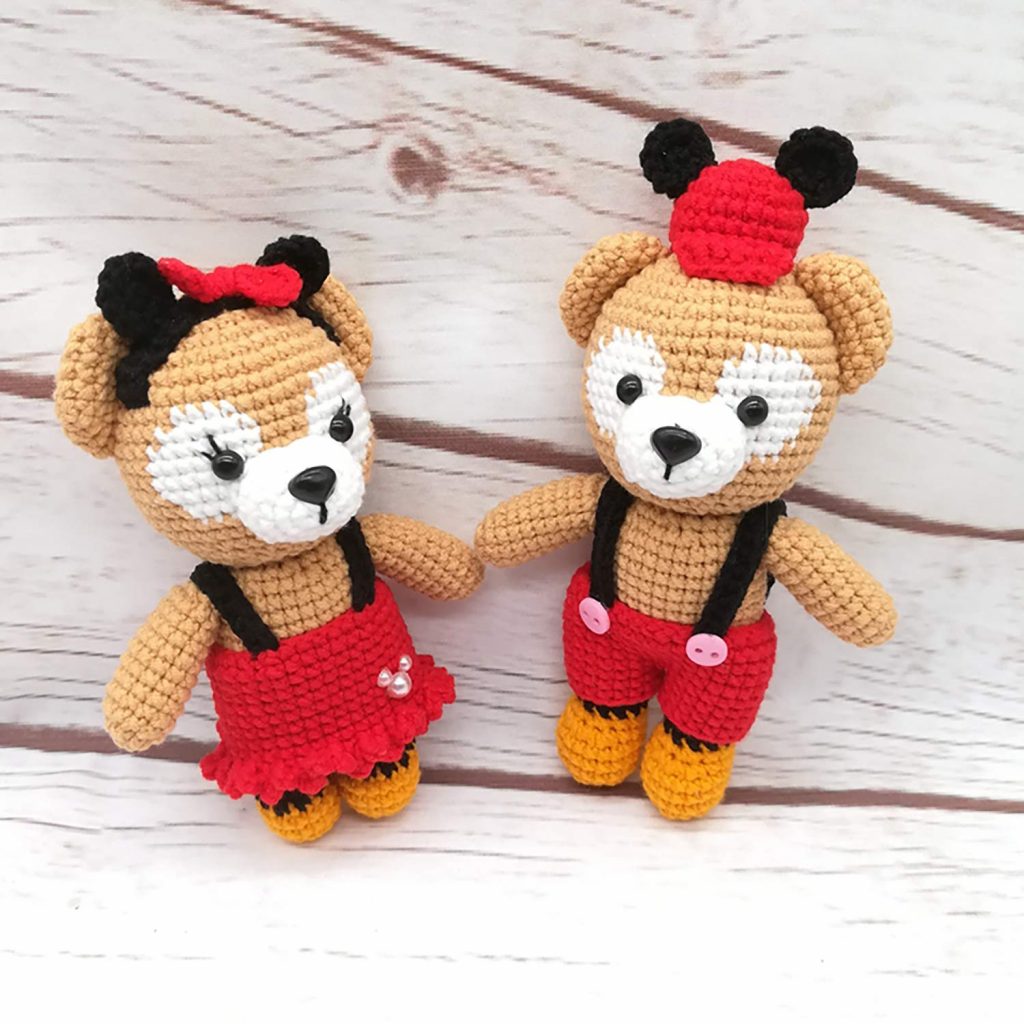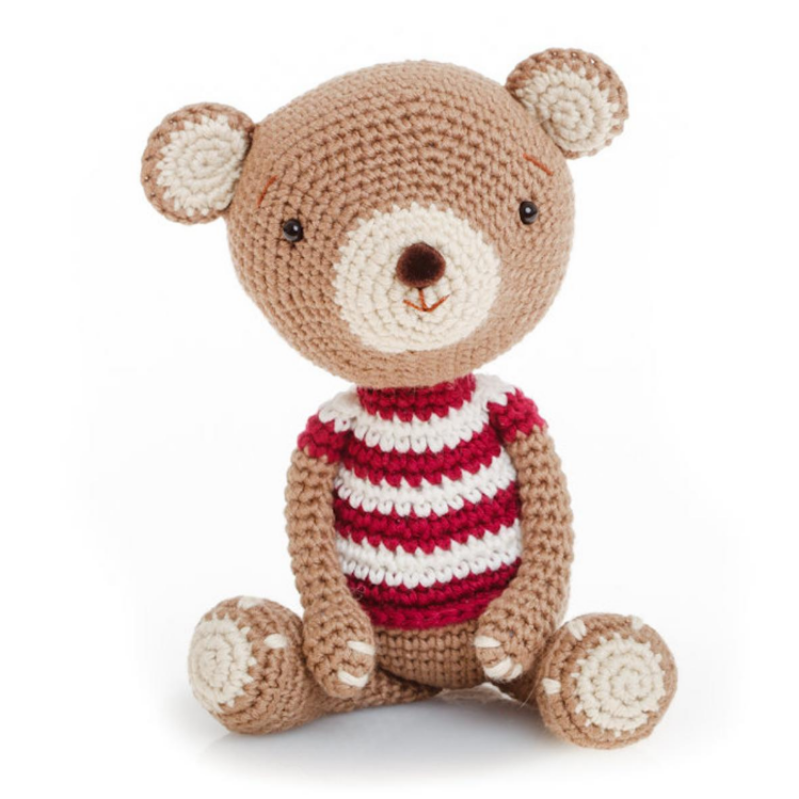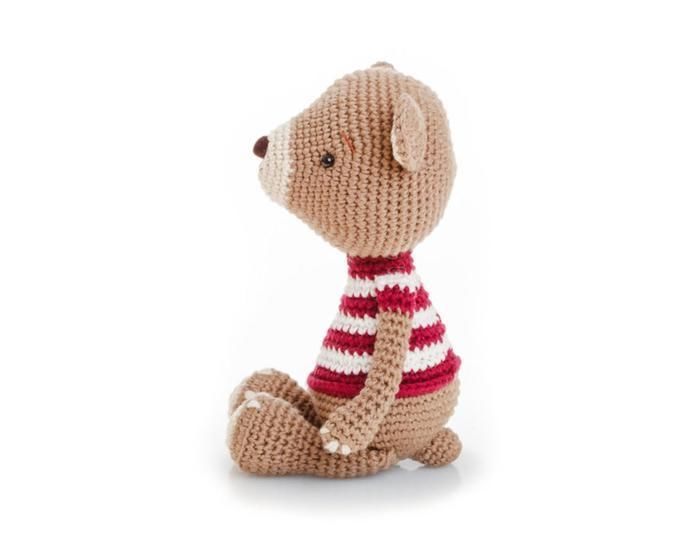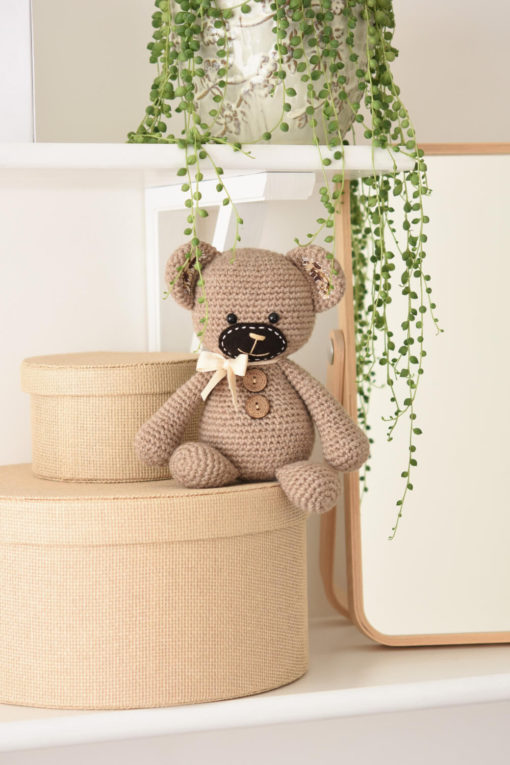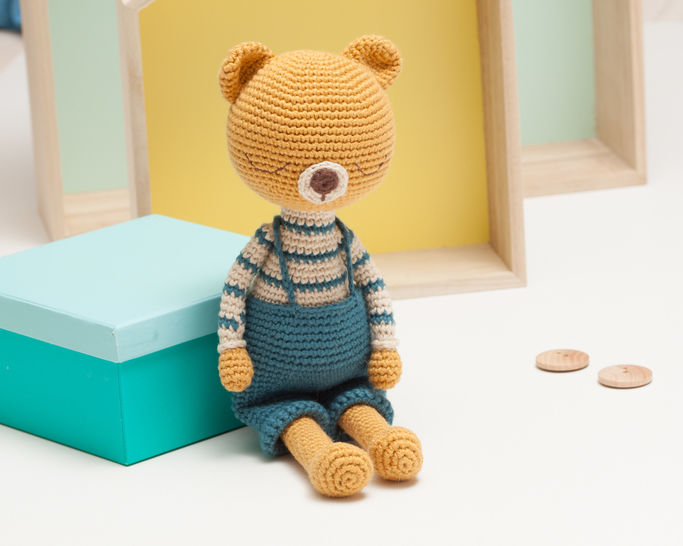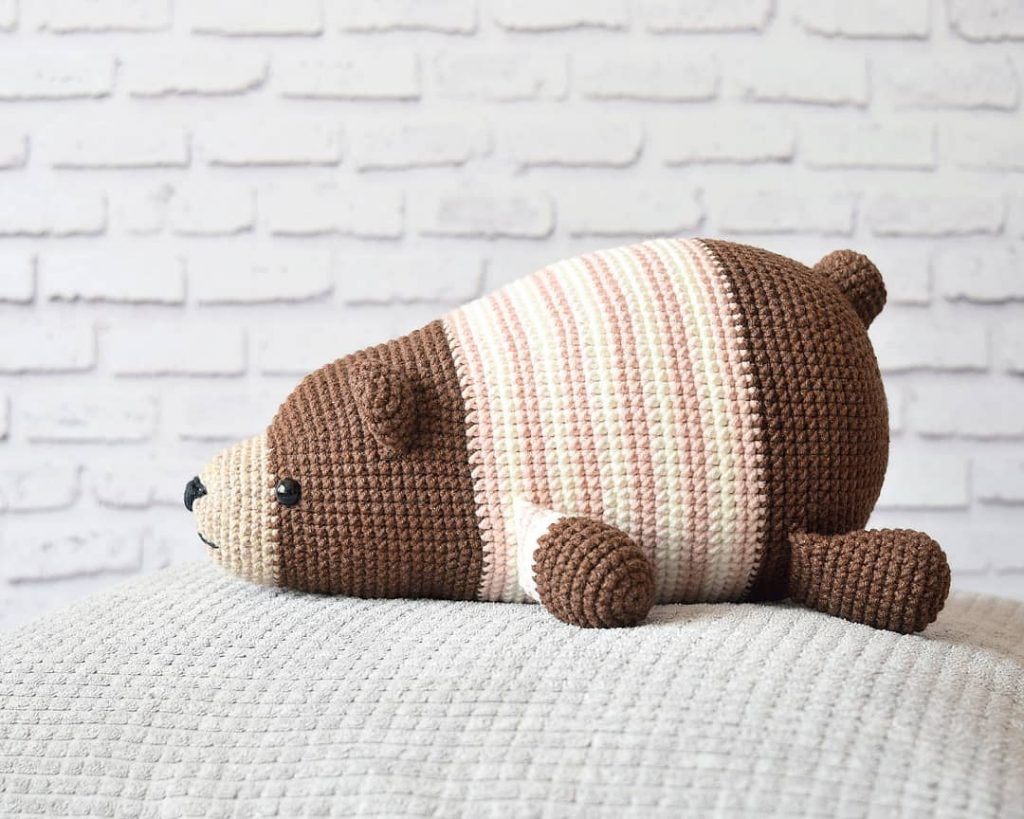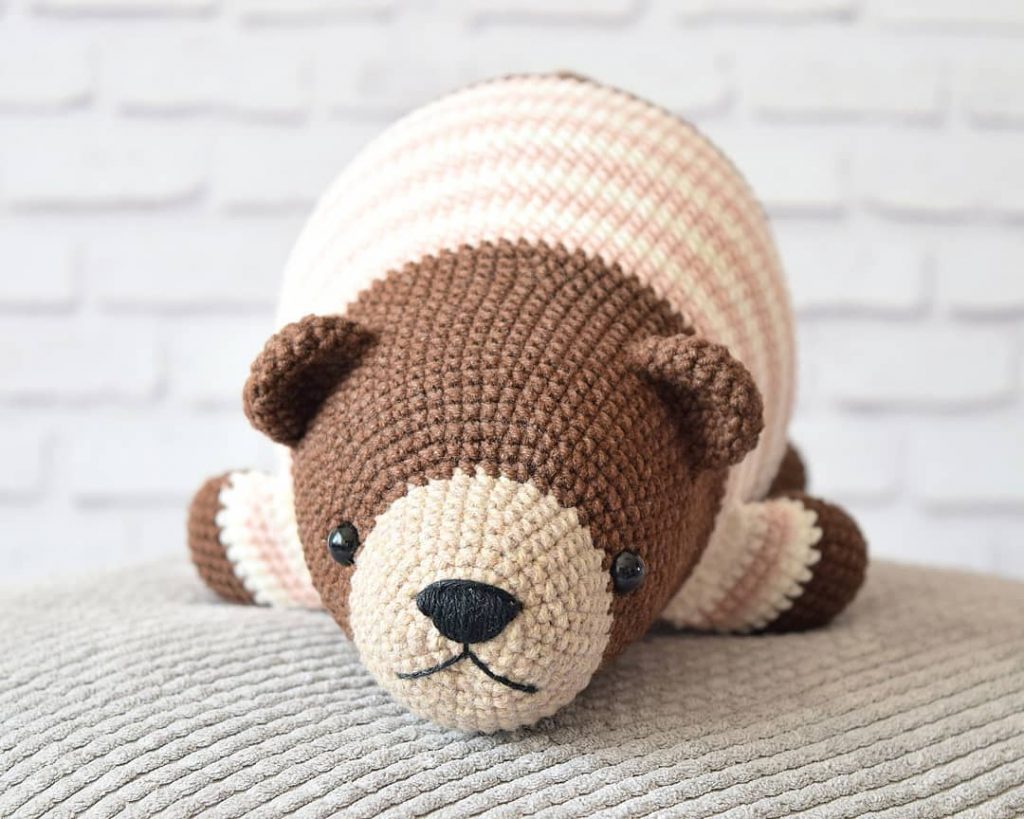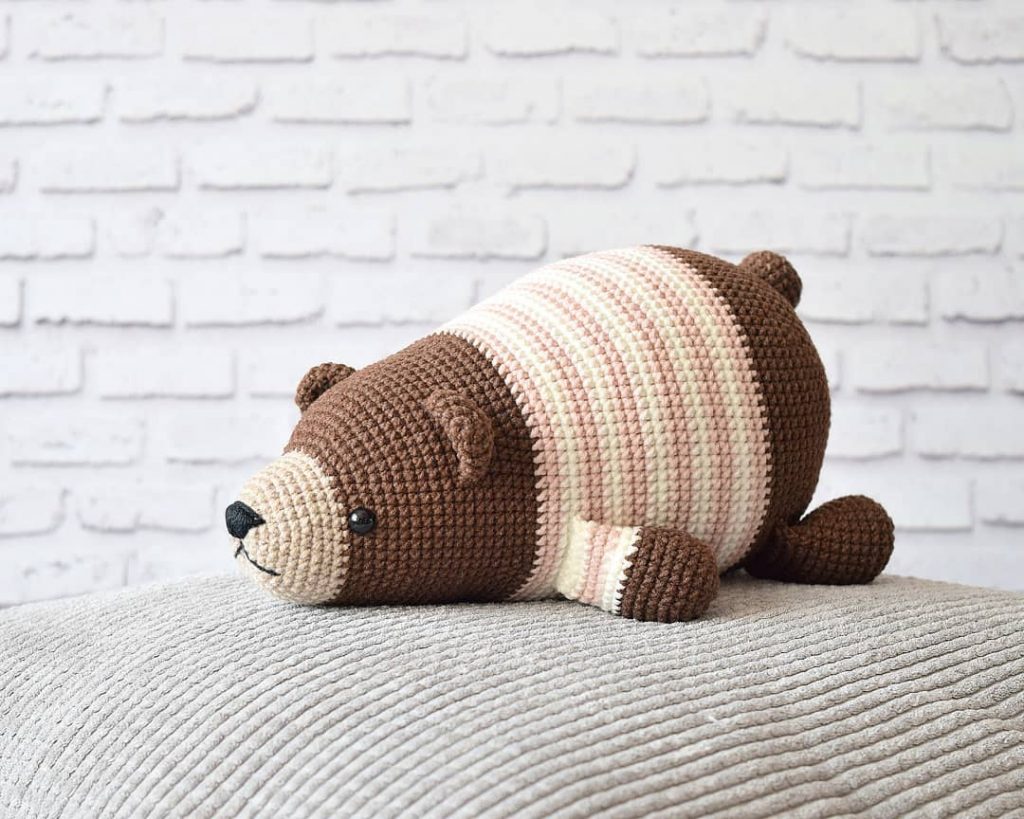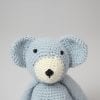
Amigurumi The Cutest Bear Free Crochet Patterns
Hello dear visitors, I am here again with new amigurumi molds for you. I am sharing amigurumi patterns for you here for free. You can make your children happy by making these patterns. Amigurumi toys are very popular lately and are the most beautiful toys that don’t harm your kids. Your kids will love them. Let’s move on to our pattern and give them this gift.
You will need
1 skein Lion Brand Heartland (Mount Rainier shown) or approx 165 yds worsted weight (4) yarn
Approx 3 yds worsted weight (4) black yarn
1 sheet white felt
1 sheet colored felt (optional)
2 buttons (1/2 – 3/4″)
Polyfil stuffing
Shank back eyes (12 mm)
Blush (optional)
4 mm crochet hook
Stitch Marker
Large & small darning needle
Scissors
Hot glue gun
Abbreviations
Ch – Chain
Sc – Single Crochet
Sc2tog – Single Crochet Two Together **see stitch description
Slst – Slip Stitch
Sts – Stitches
Head
Round 1: Make a magic ring with 6 sc. Do not join, continue to work in spiral.
Round 2: Make 2 sc in every stitch. (12 sts)
Round 3: Sc once into the first stitch and 2 sc into the next stitch. *Sc into the next stitch, 2 sc into the next. Repeat from * around. (18 sts)
Round 4: Sc once into the first 2 stitches and 2 sc into the next stitch. *Sc into the next 2 stitches, 2 sc into the next. Repeat from * around. (24 sts)
Round 5: Sc once into the first 3 stitches and 2 sc into the next stitch. *Sc into the next 3 stitches, 2 sc into the next. Repeat from * around. (30 sts)
Round 6: Sc once into the first 4 stitches and 2 sc into the next stitch. *Sc into the next 4 stitches, 2 sc into the next. Repeat from * around. (36 sts)
Rounds 7-10: Sc once into every stitch. (36 sts)
Round 11: Sc once into the first 5 stitches and 2 sc into the next stitch. *Sc into the next 5 stitches, 2 sc into the next. Repeat from * around. (42 sts)
Round 12: Sc once into the first 6 stitches and 2 sc into the next stitch. *Sc into the next 6 stitches, 2 sc into the next. Repeat from * around. (48 sts)
Rounds 13-19: Sc once into every stitch. (48 sts)
Round 20: Sc once into the first 6 stitches and scdec over the next 2 stitches. *Sc into the next 6 stitches, scdec over the next 2. Repeat from * around. (42 sts)
Round 21: Sc once into the first 5 stitches and scdec over the next 2 stitches. *Sc into the next 5 stitches, scdec over the next 2. Repeat from * around. (36 sts)
Round 22: Sc once into the first 4 stitches and scdec over the next 2 stitches. *Sc into the next 4 stitches, scdec over the next 2. Repeat from * around. (30 sts)
Round 23: Sc once into the first 3 stitches and scdec over the next 2 stitches. *Sc into the next 3 stitches, scdec over the next 2. Repeat from * around. (24 sts)
Round 24: Sc once into the first 2 stitches and scdec over the next 2 stitches. *Sc into the next 2 stitches, scdec over the next 2. Repeat from * around. (18 sts)
Bind off leaving a tail that is approximately 12″ in length.
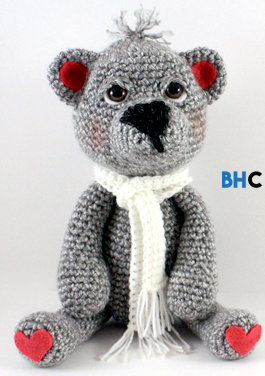
Cut two circles from a piece of white felt slightly larger than the eyes. Make a slit in the middle of each circle for the shank back to fit through. Place the eyes in between rounds 10 and 11 approximately 4 stitches apart.
Snout
Round 1: Ch 5. Sc in the 2nd chain from hook. Sc in the next 2 chains. Sc 5 into last chain. Rotate your work and Sc in the next 2 stitches. Sc 3 into the last stitch. Do not join, continue to work in spiral. (13 sts)
Round 2: Sc 2 in the first stitch. Sc in the next 3 stitches. Sc 2 in the next stitch. Sc in the next stitch. Sc 2 in the next stitch. Sc into the next 4 stitches. Sc 2 in the next stitch. Sc in the next stitch. (17 sts)
Round 3: Sc 2 into the first stitch. Sc in the next 5 stitches. Sc 2 in the next stitch. Sc in the next 2 stitches. Sc 2 in the next stitch. Sc into the next 5 stitches. Sc 2 in the next stitch. Sc into the last stitch. (21 sts)
Round 4: Sc in the first stitch. Sc 2 in the next stitch. Sc into the next 6 stitches. Sc 2 in the next stitch. Sc into the next 2 stitches. Sc 2 into the next stitch. Sc in the next 7 stitches. Sc 2 in the next stitch. Sc into the last stitch. (25 sts)
Round 5: Sc into every stitch. (25 sts)
Round 6: Sc into the first 23 stitches, slst into the last 2 stitches. (25 sts)
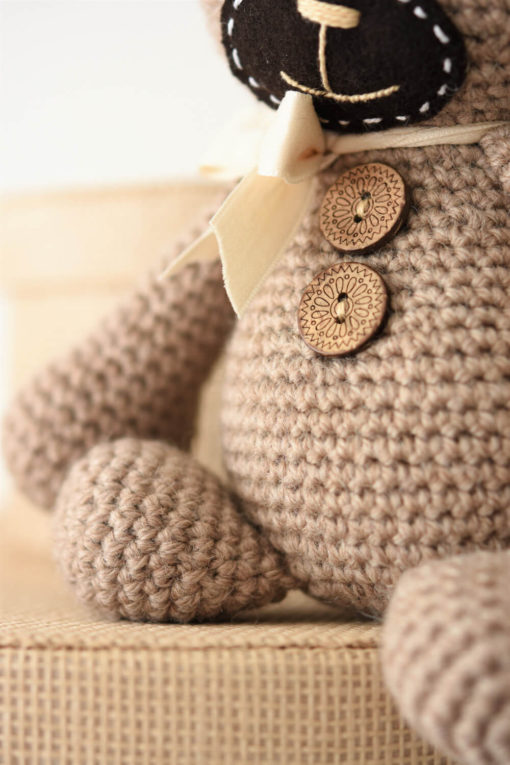
Bind off leaving a tail that is approximately 12″ in length.Using your black yarn applique the nose.
Ears (make 2)
Round 1: Make a magic ring with 6 sc. Do not join, continue to work in spiral.
Round 2: Make 2 sc in every stitch. (12 sts)
Rounds 3-5: Sc once into every stitch. (12 sts)
Bind off leaving a tail that is approximately 8″ in length.
Cut two half circles from a piece of colored felt slightly smaller than the ears. Using a hot glue gun attach the half circles to each ear.
Body
Round 1: Make a magic ring with 6 sc. Do not join, continue to work in spiral.
Round 2: Make 2 sc in every stitch. (12 sts)
Round 3: Sc once into the first stitch and 2 sc into the next stitch. *Sc into the next stitch, 2 sc into the next. Repeat from * around. (18 sts)
Round 4: Sc once into the first 2 stitches and 2 sc into the next stitch. *Sc into the next 2 stitches, 2 sc into the next. Repeat from * around. (24 sts)
Round 5: Sc once into the first 3 stitches and 2 sc into the next stitch. *Sc into the next 3 stitches, 2 sc into the next. Repeat from * around. (30 sts)
Round 6: Sc once into the first 4 stitches and 2 sc into the next stitch. *Sc into the next 4 stitches, 2 sc into the next. Repeat from * around. (36 sts)
Round 7: Sc once into the first 5 stitches and 2 sc into the next stitch. *Sc into the next 5 stitches, 2 sc into the next. Repeat from * around. (42 sts)
Rounds 8-19: Sc once into every stitch. (42 sts)
Round 20: Sc once into the first 5 stitches and scdec over the next 2 stitches. *Sc into the next 5 stitches, scdec over the next 2. Repeat from * around. (36 sts)
Round 21: Sc once into every stitch. (36 sts)
Round 22: Sc once into the first 4 stitches and scdec over the next 2 stitches. *Sc into the next 4 stitches, scdec over the next 2. Repeat from * around. (30 sts)
Round 23: Sc once into every stitch. (30 sts)
Round 24: Sc once into the first 3 stitches and scdec over the next 2 stitches. *Sc into the next 3 stitches, scdec over the next 2. Repeat from * around. (24 sts)
Rounds 25-26: Sc once into every stitch. (24 sts)
Round 27: Sc once into the first 2 stitches and scdec over the next 2 stitches. *Sc into the next 2 stitches, scdec over the next 2. Repeat from * around. (18 sts)
Rounds 28-29: Sc once into every stitch. (18 sts)
Bind off leaving a tail that is approximately 12″ in length.
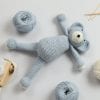
Limbs (make 4)
Round 1: Make a magic ring with 6 sc. Do not join, continue to work in spiral.
Round 2: Make 2 sc in every stitch. (12 sts)
Round 3: Sc once into the first stitch and 2 sc into the next stitch. *Sc into the next stitch, 2 sc into the next. Repeat from * around. (18 sts)
Rounds 4-8: Sc once into every stitch. (18 stitches)
Round 9: Sc once into the first stitch and scdec over the next 2 stitches. *Sc into the next 2 stitches, scdec over the next 2. Repeat from * around. (12 sts)
Rounds 10-23: Sc once into every stitch. (12 sts)
Bind off leaving a tail that is approximately 12″ in length.
Tail
Round 1: Make a magic ring with 6 sc. Do not join, continue to work in spiral.
Round 2: Make 2 sc in every stitch. (12 sts)
Rounds 3-4: Sc once into every stitch. (12 sts)
Bind off leaving a tail that is approximately 8″ in length.
Assembly
To begin the assembly of your bear, start by filling the bottom of the body and each limb with weighted craft beads or dry, uncooked rice works in a pinch. The extra weight helps the bear to sit up properly and to allow the legs to move from the standing and seated position easier.
Stuff each component of your bear and begin sewing each arm to the body first. Sew the tops of the legs closed and add a button to each leg at the top. Using a large darning needle and some scrap yarn, run the darning needle through one leg, into the body and out the other side, and finally into the other leg. Run the needle back through in the opposite direction. Tighten and tie a knot to hold the legs firmly in place. Weave in your ends.
Sew the ears in place. Sew the head to the body. Weave in all your ends.
Take two scrap pieces of yarn and with a large darning needle, feed the scrap from the back of the head out right next to the eye. Run the yarn back through to the back side. Pull to draw in the eye a bit and tie a knot. Weave in your ends and repeat for the other eye.
Eyelids: Take two pieces of scrap yarn and ch 4. Bind off.
Scarf: If you would like to crochet the same scarf as you see in the pictures, you will need approximately 15 yards of light weight (3) yarn and a 4mm crochet hook. Chain 5 and Tunisian Simple stitch until your scarf is long enough to wrap around your bear.