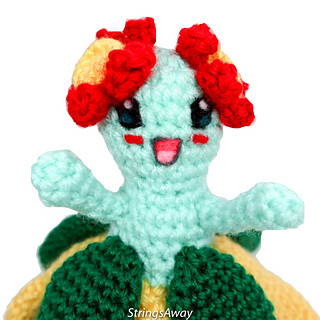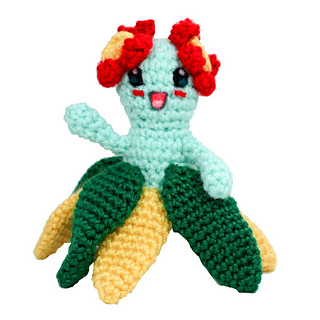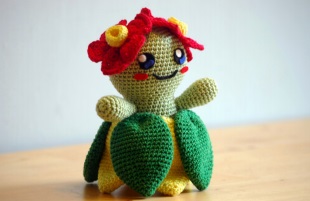
Amigurumi Bellossom Free Crochet Patterns
Hello dear visitors, I am here again with new amigurumi molds for you. I am sharing amigurumi patterns for you here for free. You can make your children happy by making these patterns. Amigurumi toys are very popular lately and are the most beautiful toys that don’t harm your kids. Your kids will love them. Let’s move on to our pattern and give them this gift.
You will need
Crochet needle (2,5 mm)
Light green yarn (for instance Katia Capri – 153)
Dark green yarn (for instance Phil Coton 3 – Golf 44)
Yellow yarn (for instance Phil Coton 3 – Citron 63)
Red yarn (for instance Cotone – 18)
Fiber fill
Black, white, blue and red felt
Abbreviations
RND = round
sc = single crochet
sl.st = slipstitch
ch = chain
tch = turning chain
dec = decrease
Head/ Body
(Use light green yarn)
RND 1: 6 sc in magic ring (6)
RND 2: 2 sc in each sc (12)
RND 3: 2 sc in each 2nd sc (18)
RND 4: 2 sc in each 3rd sc (24)
RND 5: 2 sc in each 4th sc (30)
RND 6: 2 sc in each 5th sc (36)
RND 7: 2 sc in each 6th sc (42)
RND 8: 2 sc in each 7th sc (48)
RND 9-19: 48 sc (48)
RND 20: dec over each 7th en 8th sc (42)
RND 21: dec over each 6th en 7th sc (36)
RND 22: dec over each 5th en 6th sc (30)
RND 23: dec over each 4th en 5th sc (24)
RND 24: 24 sc (24)
RND 25: 2 sc in each 4th sc (30)
RND 26-30: 30 sc (30)
RND 31: 2 sc in each 5th sc (36)
RND 32: 2 sc in each 6th sc (42)
RND 33: 2 sc in each 7th sc (48)
RND 34: 2 sc in each 8th sc (54)
RND 35-38: 54 sc (54)
Start filling and keep filling until the last round.
RND 39: dec over each 8th en 9th sc (48)
RND 40: dec over each 7th en 8th sc (42)
RND 41: dec over each 6th en 7th sc (36)
RND 42: dec over each 5th en 6th sc (30)
RND 43: dec over each 4th en 5th sc (24)
RND 44: dec over each 3rd en 4th sc (18)
RND 45: dec over each 2nd en 3rd sc (12)
RND 46: dec over each 2 sc (6)
Tie-off with a sl.st. Close the head/body.
Arms (Make 2)
(Use light green yarn)
RND 1: 6 sc in magic ring (6)
RND 2: 2 sc in each sc (12)
RND 3: 2 sc in each 4th sc (15)
RND 4-7: 15 sc (15)
RND 8: dec over each 4th en 5th sc (12)
RND 9-10: 12 sc (12)
RND 11: dec over each 3rd en 4th sc (9)
RND 12-13: 9 sc (9)
Fill the arms. Tie-off with a sl.st and leave enough yarn to sew the arms to the body.
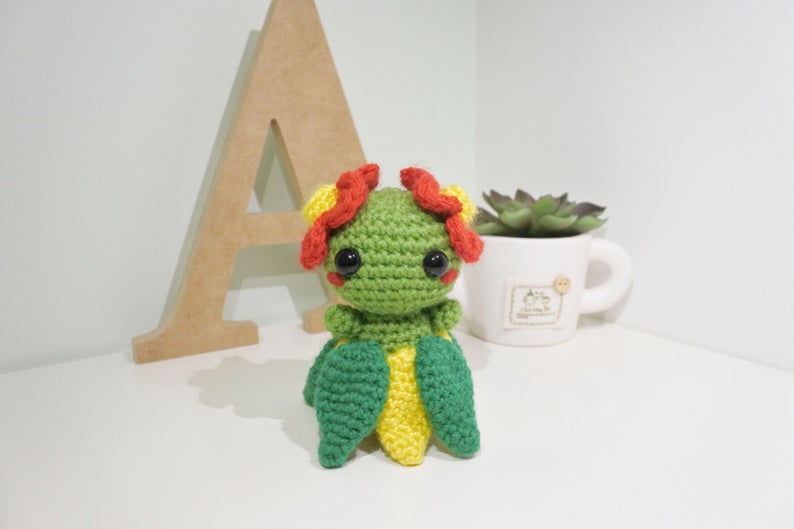
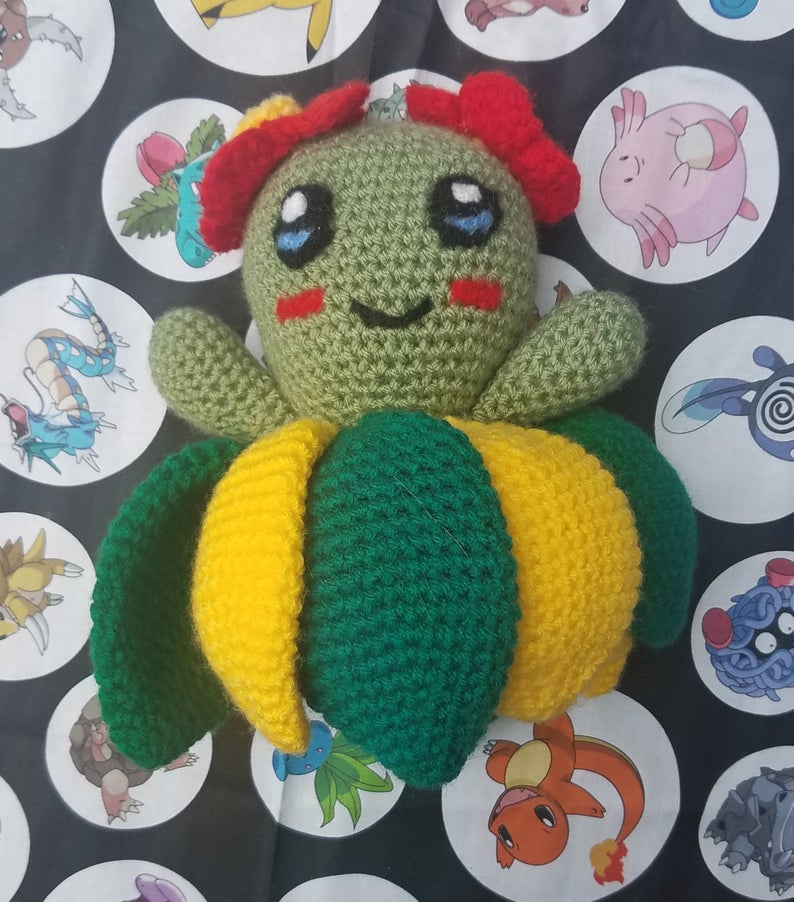
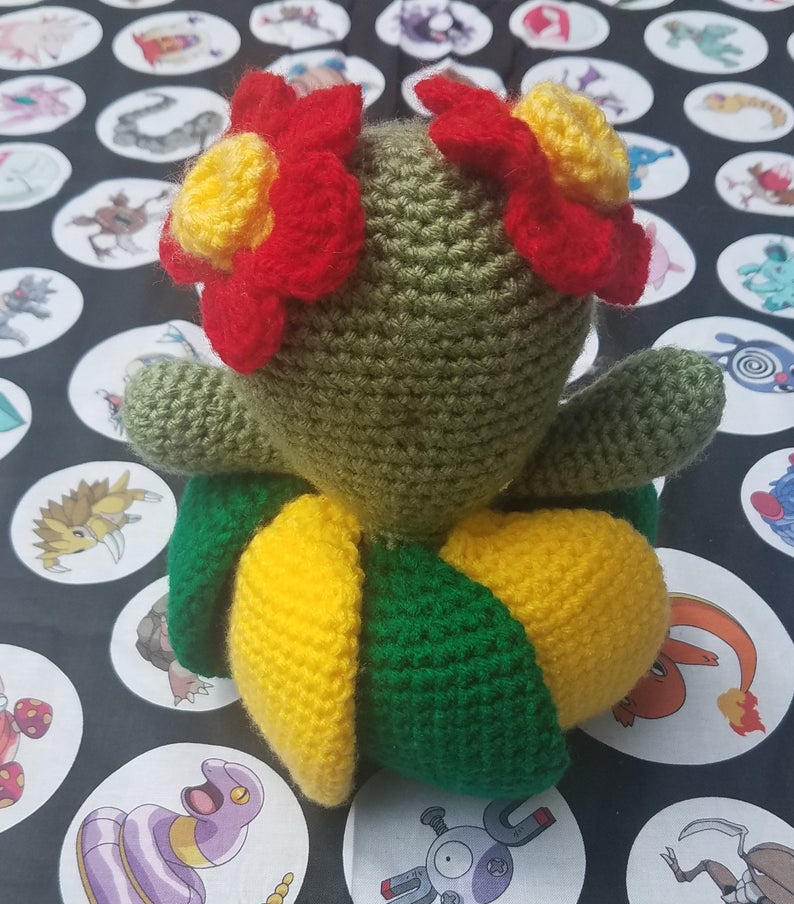
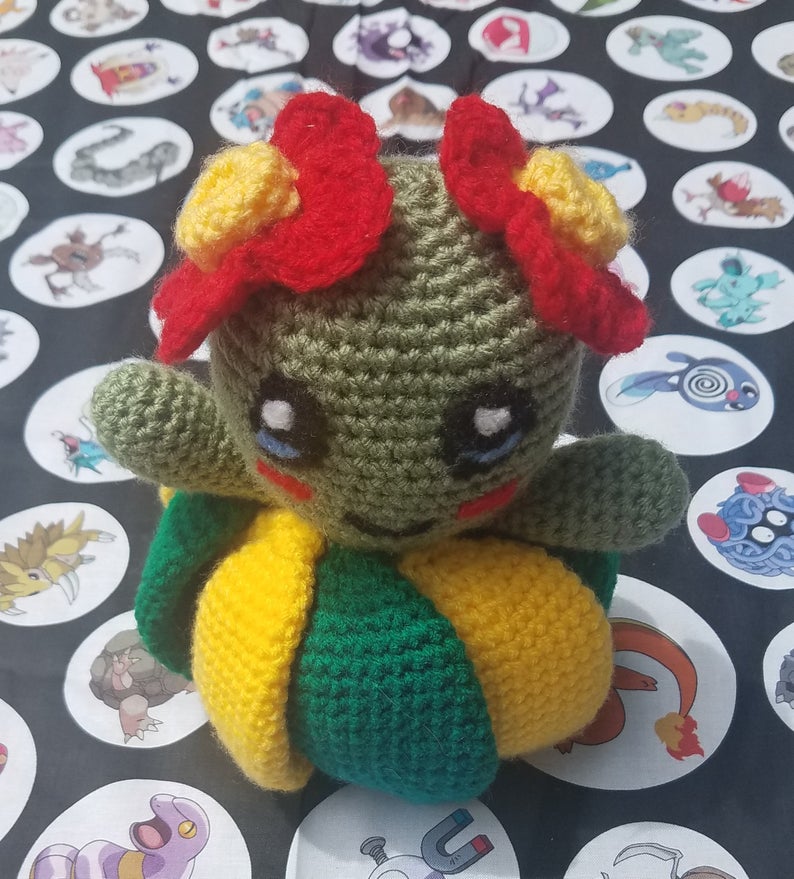
Leaves (Make 8)
(Make 4 dark green and 4 yellow leaves)
RND 1: 6 sc in magic ring (6)
RND 2: 6 sc (6)
RND 3: 2 sc in each sc (12)
RND 4: 12 sc (12)
RND 5: 2 sc in each 2nd sc (18)
RND 6: 18 sc (18)
RND 7: 2 sc in each 3rd sc (24)
RND 8: 24 sc (24)
RND 9: 2 sc in each 4th sc (30)
RND 10-19: 30 sc (30)
RND 20: dec over each 4th en 5th sc (24)
RND 21: dec over each 3rd en 4th sc (18)
RND 22: dec over each 2nd en 3rd sc (12)
RND 23: dec over each 2 sc (6)
Tie-off with a sl.st and leave enough yarn to sew the leaves to the body.
Flower Core (Make 2)
(Use yellow yarn)
RND 1: 6 sc in magic ring (6)
RND 2: 2 sc in each sc (12)
RND 3-5: 12 sc (12)
Tie-off with a sl.st and leave enough yarn to sew the flower core to the head.
Petals (Make 10)
(Use red yarn)
Row 1: 3 ch + 1 tch (3)
Row 2: 3 sc + 1 tch (3)
Row 3: 2 sc in the 1st sc, 1 sc in the other ch + 1 tch (4)
Row 4: 2 sc in the 1st sc, 1 sc in the other sc + 1 tch (5)
Row 5: 2 sc in the 1st sc, 1 sc in the other sc + 1 tch (6)
Row 6: crochet an edge of sc around the petals
Assembly
Tie-off with a sl.st and leave enough yarn to sew the petals to the head.
Putting all the parts together
Make the leaves flat. First sew the yellow leaves around the body, somewhere at round 30. Then sew the green leaves to
the yellow leaves.
Sew the arms to the body, somewhere at round 26.
Sew the flower cores to the head, somewhere at round 6. Sew the petals around the core.
Face
Cut 2 circles out of black felt. Cut 2 smaller circles out of white felt. Cut 2 ovals out of blue felt. Paste the white circles
onto the black circles. Paste the blue ovals below the white circles. Then paste the eyes to the head, somewhere at round 12
with 5 stitches between the eyes.
Cut a mouth out of black felt. Paste it to the head, somewhere at round 17.
Cut 2 cheeks out of red felt. Paste these to the head, somewhere at round 16.