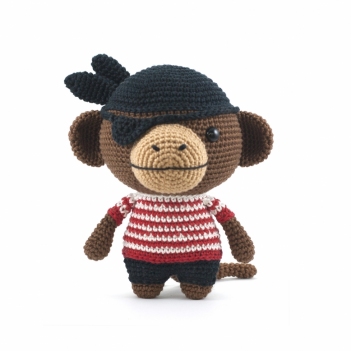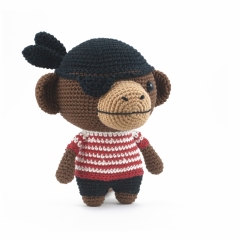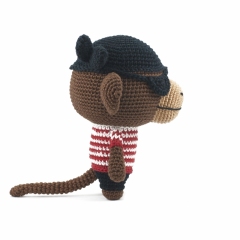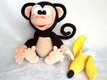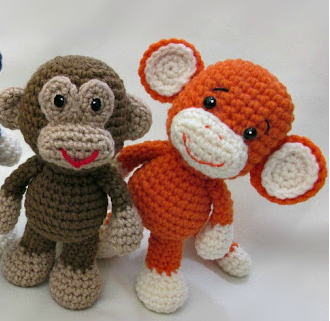
Amigurumi BigFoot Monkey Free Crochet Patterns
Hello dear visitors, I am here again with new amigurumi molds for you. I am sharing amigurumi patterns for you here for free. You can make your children happy by making these patterns. Amigurumi toys are very popular lately and are the most beautiful toys that don’t harm your kids. Your kids will love them. Let’s move on to our pattern and give them this gift.
You will need
One lighter and one darker color of Red Heart Super Saver or Red Heart Comfort 100% acrylic yarn
4.5mm hook – use a smaller hook if you see gaps in your stitches
blunt end yarn needle for sewing
sharp end needle if doing embroidery and embroidery thread
scissors
100% polyester stuffing
felt, paint, buttons, or yarn for eyes ( I used 8mm buttons a 7.5mm and also a 9mm safety eyes. But size is not critical and can vary)
optional – fabric tac (fabric glue) or invisible thread (if making the larger ears)
optional – pipe cleaner to make tail poseable and help the monkey stand
Abbreviations
st = stitch
sc = single crochet
sl st = slip stitch
2tog = crochet 2 stitches together
f/o = finish off
Head and Body
Starting at the top of the head working down to bottom of body:
1) magic circle with 6sc (6)
2) 2sc in each st (12)
3) 1sc then 2sc in next st (18)
4) 1sc in next 2st then 2sc in next st (24)
5) 1sc in next 5st then 2sc in next st (28)
6-9) 1sc in each st for 4 rows
10) 1sc in next 6st then 2sc in next st (32)
11-12) 1sc in each st for 2 rows
13) 1sc in next 6st then 2tog (28)
14) 1sc in next 5st then 2tog (24)
15) 1sc in next 2st then 2tog (18)
16) 1sc then 2tog (12)
stuff head, shape as you stuff. See video (time at 17:57) for tips on stuffing
17) 1sc in each st
18) 2sc in each (24)
19-21) 1sc in each st for 3 rows
22) 1sc in next 3st then 2sc in next st (30)
23-24) 1sc in each st for 2 rows
25) 1sc in next 3st then 2tog (24)
26) 1sc in next 2st then 2tog (18)
27) 1sc then 2tog (12)
stuff body firmly and shape as you stuff
28) 1sc then 2tog (8) stuff more if needed
29) 2tog twice and f/o. Weave yarn tail in and out the remaining stitching and pull tight to close the gap. Knot off and hide yarn tail in body
Muzzle
with lighter color
1) ch8
2) starting with 2nd ch from hook, 1sc in each ch across (7) now continue on around the other side of the ch and 1sc in each of the outer loops (14) (see video at 58:14 on how to do this row)
3) 2sc in first st, 1sc in next 5st, 2sc in next 2st, 1sc in next 5st, 2sc in next st (18)
4) 1sc in each st
5) (we only use 4st of this row) 1sc in next 3st, sl st next st and f/o leaving a long tail for sewing. Add in a mouth before sewing muzzle to head.
Eye Patches
with lighter color
1) magic circle with 6sc (6)
2) 3sc in first st, 1sc in next 3st, 3sc in next st, 1sc in the next st (10)
sl st next st and f/o leaving a long tail for sewing
Ears
Larger Outer Ears: Make 2 with color used to make head and body
1) magic circle with 6sc (6)
2) 2sc in each st (12) crochet around starting yarn tail
3) 1sc then 2sc in next st (18)
4) 1sc in each st
sl st next st and f/o leaving a long tail for sewing
Smaller Inner Ears: Make 2 with lighter color
1) magic circle or adjustable loop with 6st (6)
2) 2sc in each st (12) work starting yarn tail into the 2nd row
3) 1sc in next 3st then 2sc in next st (15)
sl st next st and f/o
Arms
with lighter color
1) magic circle with 6sc (6)
2) 2sc in each st (12)
3-4) 1sc in each st for 2 rows
5) 1sc in next 2st then 2tog (9)
6) 2tog then 1sc in next 6st, switch colors on next st (8)
7) sl st first st then 1sc in next 7st (8)
8-12) 1sc in each st for 5 rows
sl st and f/o leaving a long tail for sewing. Lightly stuff hand, do not stuff arm.
Legs
with lighter color
1) magic circle with 6sc (6)
2) 2sc in each st (12)
3) 1sc then 2sc in next st (18)
4-6) 1sc in each st for 3 rows
7) (2tog then 1sc in next st, repeat 4 times) 1sc in next 6st (14)
8) (2tog then 1sc in next st, repeat 3 times) 1sc in next 3st, switch colors in next st, sl st next st (11)
9) 2tog then 1sc in next 9st (10)
10-14) 1sc in each st for 5 rows
sl st and f/o leaving a long tail for sewing. Stuff & shape foot stuff leg.
Tail
with lighter color – you can make the tail longer if desired by adding more rows in between rows 6 and 18
1) magic circle with 6sc (6)
2) 1sc then 2sc in next st (9)
3) 2sc in first st then 1sc in next 8st (10)
4) 1sc in next 3st then 2tog (8)
5) switch colors on first st, sl st next st, 1sc next 6st (8)
6-18) 1sc in each st for 13 rows
stuff the lighter color part of the tail, do not stuff the rest.
sl st and f/o leaving a long tail for sewing. Bend a pipe cleaner in half and insert into the tail to make the tail poseable. Cut any excess pipe cleaner off
Assembly
1) Sew the arms on. These get sewn directly under the head
2) sew on the legs. How you sew the legs on is up to you. I wanted this monkey to be in a standing position so I sewed them on in a way the doll stands up.
3) sew on tail
4) sew on the muzzle (top of muzzle should sit just above the 10th or 11th row).
5) add eyes to the eye patches then sew the eye patches to the head.
6) sew on the ears (between the 8th and 12th row). Pin them in place before sewing them in helps.