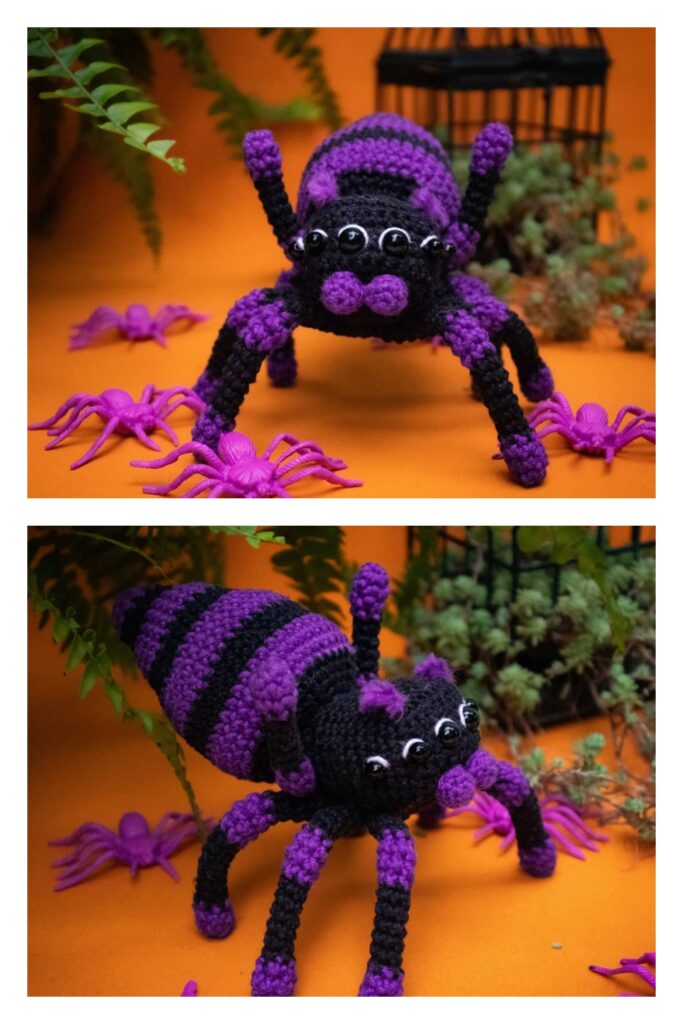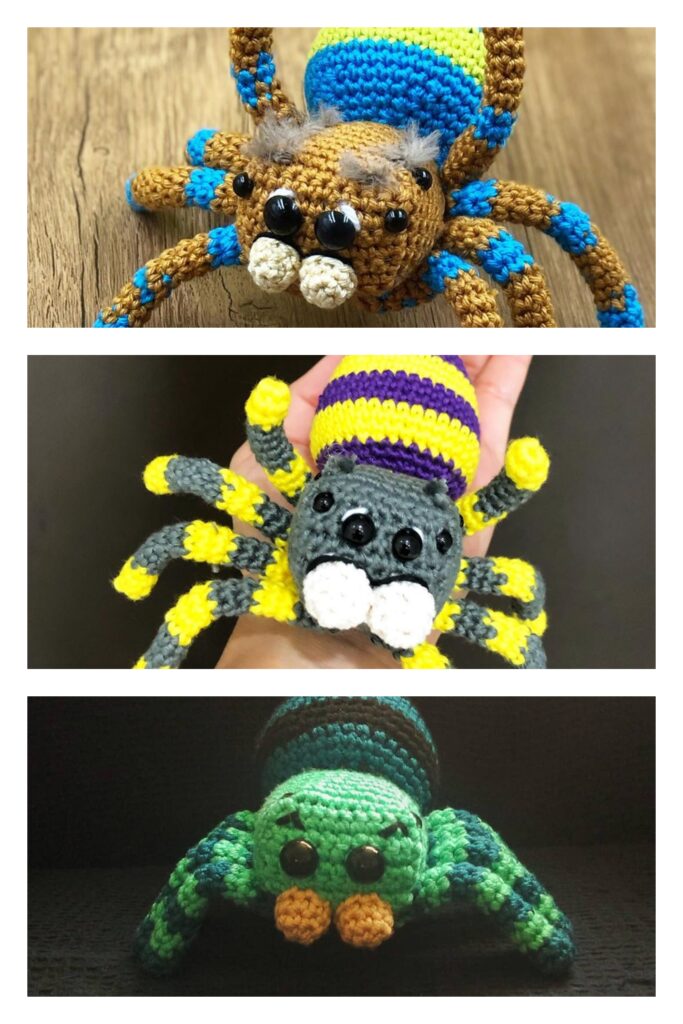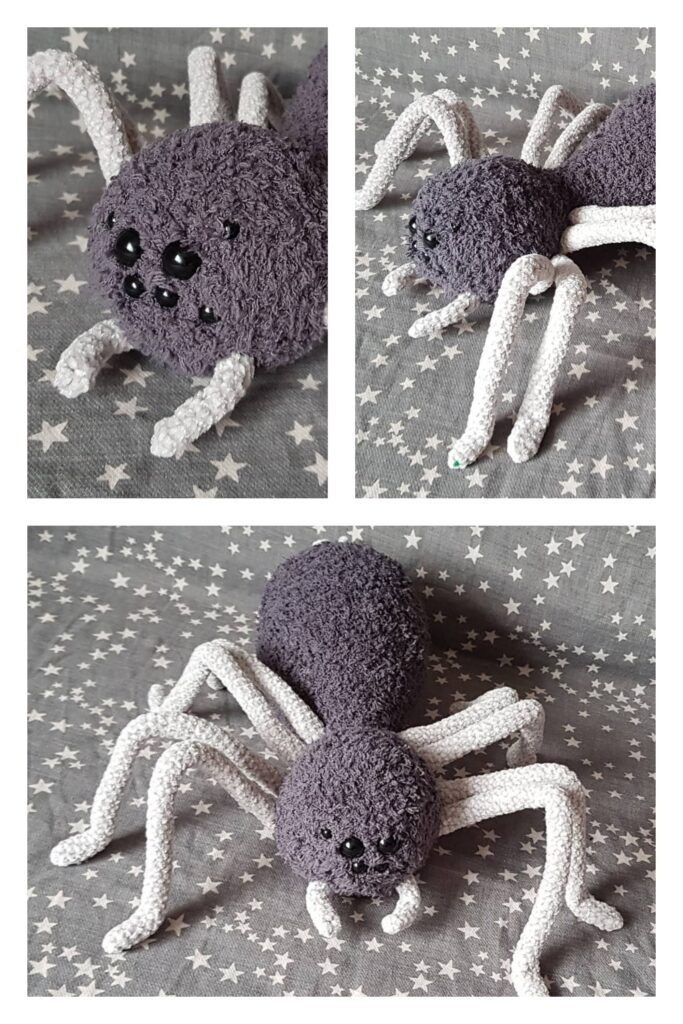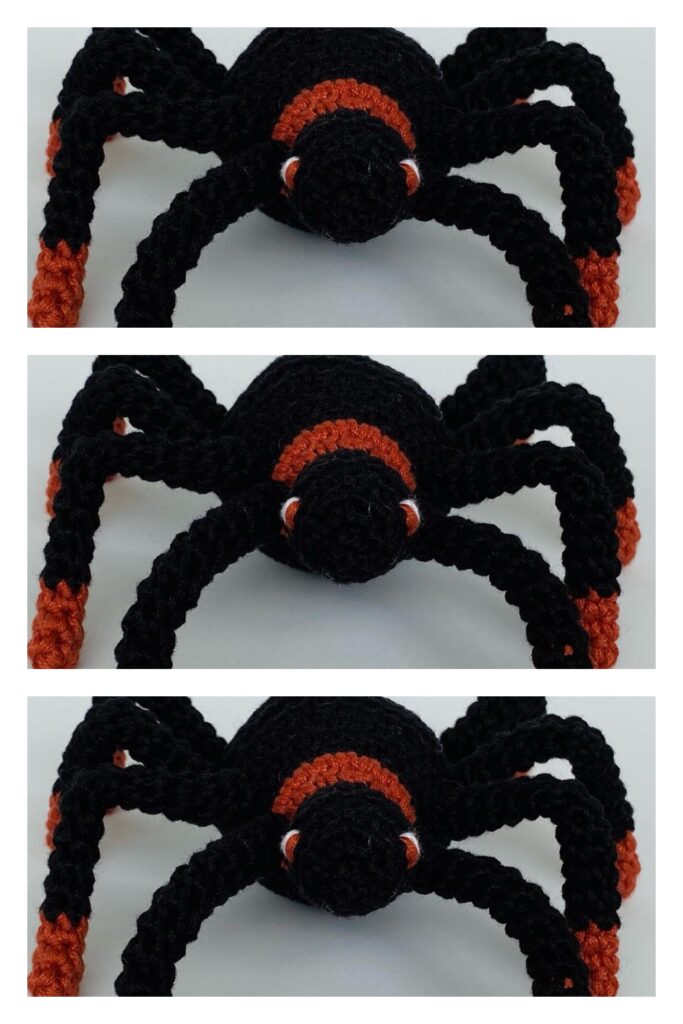
Amigurumi Charlotte The Spider Free Crochet Patterns
Hello dear visitors, I am here again with new amigurumi molds for you. I am sharing amigurumi patterns for you here for free. You can make your children happy by making these patterns. Amigurumi toys are very popular lately and are the most beautiful toys that don’t harm your kids. Your kids will love them. Let’s move on to our pattern and give them this gift.
You will need
Worsted-Weight Yarn
Yarn in Silver (~47 yards)
Yarn in Pink (<1 yard)
D (3.25mm) crochet hook
Black embroidery floss
Embroidery needle
Polyfil or stuffing of your choice
Yarn/Darning needle
Scissors
Pet Slicker Brush (optional)
Locking Stitch Markers (optional)
Abbreviations
sc – single crochet
st/sts – stitch(es)
inc – increase (add 2 single crochet into a stitch)
dec – decrease (join 2 single crochet into 1)
dc – double crochet
sl st – slip stitch
R1- round 1
( ) – repeat this group of stitches
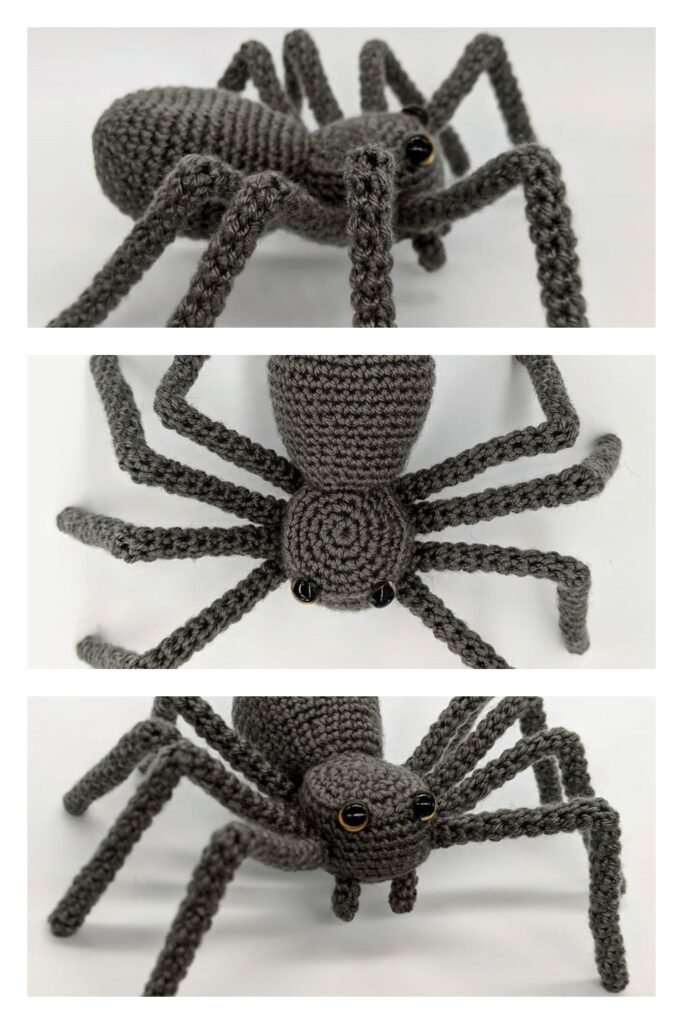
Head and Body
Using Color Grey
R1: 4 sc into a magic circle {4 sts}
Alternate way to begin: chain 2, sc 4 times in 2nd chain from hook {4 sts}
R2: (sc in next st, 3 sc in next st) 2 times {8 sts}
R3: (sc in next st, 3 sc in next st) 4 times {16 sts}
R4: sc in next 2 sts, (3 sc in next st, sc in next 3 sts) 3 times, 3 sc in next st, sc in next st {24 sts}
R5: sc in next 3 sts, (3 sc in next st, sc in next 5 sts) 3 times, 3 sc in next st, sc in next 2 sts {32 sts}
R6: sc in next 4 sts, (3 sc in next st, sc in next 7 sts) 3 times, 3 sc in next st, sc in next 3 sts {40 sts}
R7: sc in back loop only in next 40 sts {40 sts}
R8-15: sc in next 40 sts {40 sts}
R16: (dec, sc in next 3 sts) 8 times {32 sts}
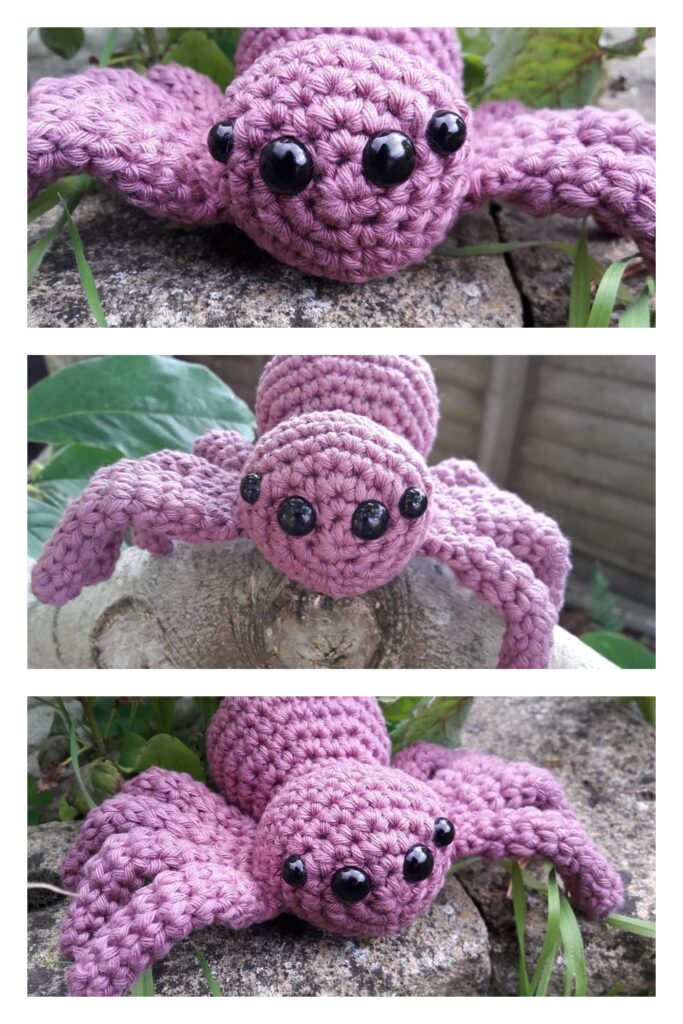
Embroider The Eyes And Lashes
Begin by placing a pin in the middle of the piece, between R12 and R13.
Thread a long piece of embroidery floss into a needle. Knot the end.
On the inside of your piece, pick up a bit of yarn with your needle and make a knot on the inside of the head. Begin to embroider into the 2nd stitch to the right of the pin.
Insert your needle one round up and one stitch over.
Make a knot on the inside of the head and then insert your needle back through the same stitch.
Insert your needle one round down and one stitch over. Make a knot on the inside of the head. Then insert your needle back through the same stitch.
Insert your needle one round up to make the first eyelash.
Move your needle up to make the second eyelash. Secure with a knot on the inside of the head.
Repeat on the other side. Begin to embroider into the 2nd stitch to the left of the pin.
R17: (dec, sc in next 2 sts) 8 times {24 sts}
Begin to stuff the head and continue as you crochet. Make sure not to overstuff. You want the top and bottom to lay flat.
R18: (dec, sc in next st) 8 times {16 sts}
R19: (dec) 8 times {8 sts}
Fasten off and leave a long piece of yarn to sew the head shut.
Small Legs (Make 2)
Using Color Grey
R1: 4 sc into a magic circle {4 sts}
Alternate way to begin: chain 2, sc 4 times in 2nd chain from hook {4 sts}
R2: (inc) 4 times {8 sts}
R3-4: sc in next 8 sts {8 sts}
R5: sc in next 2 sts, dec in next 2 sts, sc in next 2 sts {6 sts}
R6-7: sc in next 6 sts {6 sts}
Fasten off and sew each leg shut. No stuffing needed. Set aside until assembly.
Medium Legs (Make 2)
Using Color Grey
R1: 4 sc into a magic circle {4 sts}
Alternate way to begin: chain 2, sc 4 times in 2nd chain from hook {4 sts}
R2: (inc) 4 times {8 sts}
R3-4: sc in next 8 sts {8 sts}
R5: sc in next 2 sts, dec in next 2 sts, sc in next 2 sts {6 sts}
R6-9: sc in next 6 sts {6 sts}
Fasten off and sew each leg shut. No stuffing needed. Set aside until assembly.
Long Legs (Make 4)
Using Color Grey
R1: 4 sc into a magic circle {4 sts}
Alternate way to begin: chain 2, sc 4 times in 2nd chain from hook {4 sts}
R2: (inc) 4 times {8 sts}
R3-4: sc in next 8 sts {8 sts}
R5: sc in next 2 sts, dec in next 2 sts, sc in next 2 sts {6 sts}
R6-11: sc in next 6 sts {6 sts}
Fasten off and sew each leg shut. No stuffing needed. Set aside until assembly.
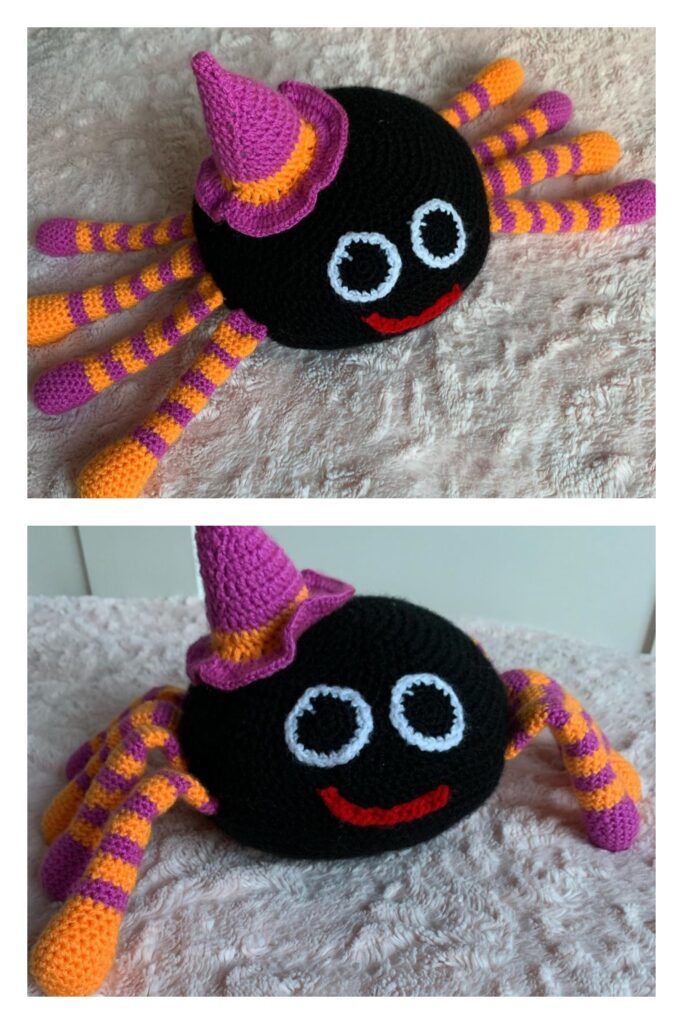
Bow
Using Color Pink
Make a slipknot with a long tail and chain 3
Rd 1: Starting in the 3rd chain from hook dc 4 times, chain 3 and sl st into the same stitch, chain 3, dc 4 times into the same stitch, chain 3 and sl st into the same stitch
Fasten off and leave a long tail. Tighten the yarn connected to your slipknot. Make a knot in the back of the bow and wrap some yarn around the bow and then knot the 2 pieces of yarn. Use the remaining yarn to attach to the head.
Step-By-Step
Starting in the 3rd chain from hook dc 4 times
chain 3 and sl st into the same stitch
chain 3
dc 4 times into the same stitch
chain 3 and sl st into the same stitch
Fasten off and leave a long tail. Tighten the yarn connected to your slipknot
Make a knot in the back of the bow and wrap some yarn around the bow and then knot the 2 pieces of yarn.
Set aside until assembly.
Assembly
I recommend pinning the parts first. This will give you a better idea of where you’d like the parts to be attached before actual assembly.
Note: If you’d like fluffy spider legs, brush out each leg with a pet slicker brush before attaching.
Grab a short leg you set aside. Thread the fastened off yarn into a darning needle and insert the needle between R14 and R15 of the body – a stitch or two away from the eye.
Then go down through a stitch of the leg to connect it to the body.
Continue to go up through a stitch of the body.
And down through a stitch of the leg.
Continue this on the other side with the second short leg.
Attach a medium leg on each side – next to the short leg.
Attach a long leg on each side – next to the medium leg and repeat with the last two long legs.
Attach bow between R7 and R8.
Weave in all the excess pieces of yarn into the body.
Fluffy spider legs – use a pet slicker brush to lightly brush out the legs before attaching.