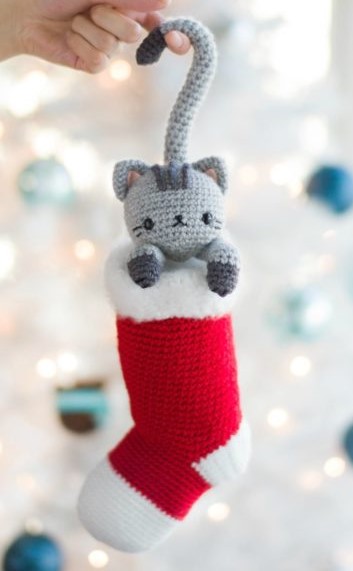
Amigurumi Christmas Cat Free Crochet Patterns
Hello dear visitors, I am here again with new amigurumi molds for you. I am sharing amigurumi patterns for you here for free. You can make your children happy by making these patterns. Amigurumi toys are very popular lately and are the most beautiful toys that don’t harm your kids. Your kids will love them. Let’s move on to our pattern and give them this gift.
You will need
red yarn, 38 g
white yarn, 20 g
fuzzy white yarn, 13 g
light grey yarn , 55 g
dark grey yarn , 4 g
2.75 mm crochet hook (with red, dark grey, and light grey yarn), 4 mm crochet hook (with fuzzy white yarn)
Yarn needle (bent tip helpful for attaching amigurumi part)
fiberfill
pink felt (for lining of ears)
9 mm safety eyes
black embroidery floss or thin cotton yarn
glue gun
decorative floral wiring (12 gauge)
Clover lock ring stitch markers
dog slicker brush (optional)
Note
- I worked in continuous rounds (vs. joined rounds) unless otherwise indicated.
- For a cleaner colour change, when working last stitch in old colour: work as if typical single crochet until two stitches are left on the hook (i.e. insert hook into stitch, yarn over, pull up a loop). Use new colour to yarn over and pull through both loops. Work slip stitch in next stitch using new colour. Then continue crocheting single crochets as normal with new colour.
Stocking
We will begin with the toe of the stocking. Using white yarn and 2.75 mm hook,
Round 1: 6 sc in Magic Ring. (6 sts)
R2: Inc around. (12 sts)
R3: Sc 1, Inc, rep 6 times. (18 sts)
R4: Sc 2, Inc, rep 6 times. (24 sts)
R5: Sc 3, Inc, rep 6 times. (30 sts)
R6: Sc 4, Inc, rep 6 times. (36 sts)
R7: Sc 5, Inc, rep 6 times. (42 sts)
R8-15: Sc 42
R16: Sc 6. Switch to red yarn, Sc 36. (42 sts)
R17-18: Sc 42
R19: Sc 20, Inc, rep 2 times. (44 sts)
R20-24: Sc 44
Place stitch marker in last stitch of round (1st stitch marker- green in pic below). DO NOT CUT RED YARN (we will continue working with this after the heel is complete). Count 17 stitches clockwise and place stitch marker (2nd stitch marker- peach in pic). This 2nd marker is where we will begin working in turned rounds to make the heel!

We will be working back and forth in turned rows for this part.
Using white yarn, join in stitch where second stitch marker (peach) is located,
Row 1: Sc 22.
Rows 2-7: Chain 1, turn. Starting from second chain from hook, Sc 22.
Chain 10, slip stitch to first single crochet of Row 7.
Now we will begin working in continuous unjoined rounds to form the back heel of the stocking:
Round 1: Single crochet around heel, then back loops of Chain 10 (i.e. Sc 21, Sc 10 in back loops only, Sc 1) (32 sts)
R2: Sc 2, Dec, rep 8 times. (24 sts)
R3: Sc 1, Dec, rep 8 times. (16 sts)
R4: Dec, rep 8 times. (8 sts)
R5: Dec, rep 4 times. (4 sts)
Fasten off.
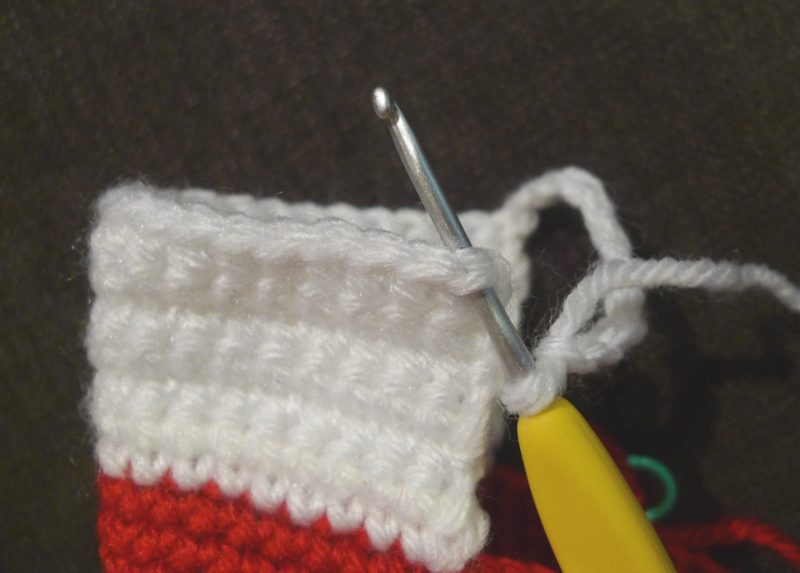
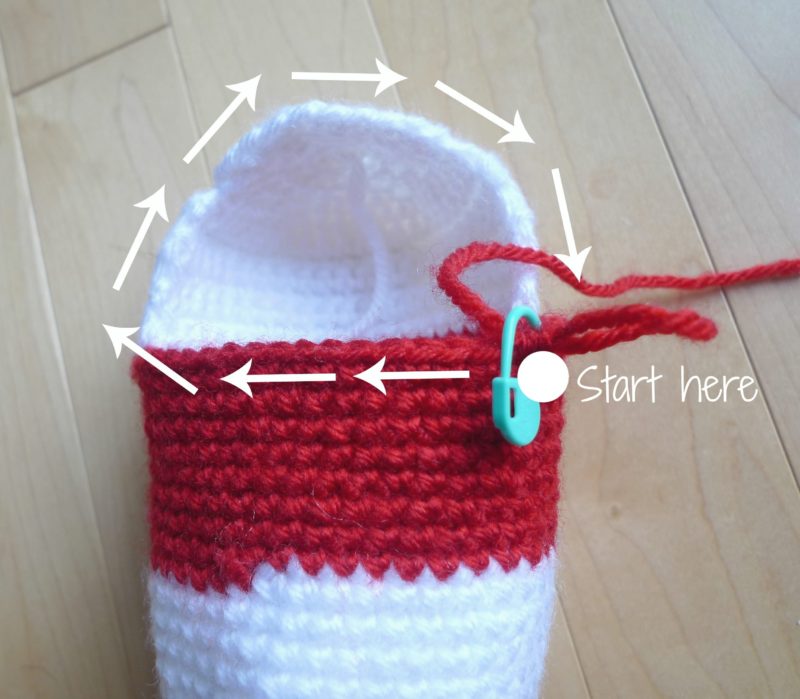
Now, we will begin the upper body of the stocking! Work in continuous unjoined rounds.
Starting in the stitch where you placed the 1st stitch marker (green) and where working red yarn is located.
Round 1: Sc 44 (my numbers were: Sc 16 for the red part, Sc 22 for the white part [using resultant front loops], Sc 6 for the red part).
R2-22: Sc 44 (44 sts)
Fasten off.
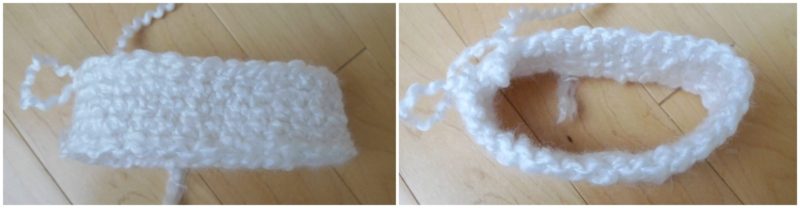
Fuzzy rim of stocking:
Using fuzzy white yarn and 4 mm hook,
Chain 31, slip stitch to first chain to join.
Round 1: Chain 1 (counts as 1 sc), Sc 30, sl st to join. (31 sts)
R2-6: Repeat R1.
Fasten off, leave long end for sewing. When working with fuzzy yarn, the “wrong” side is fuzzier. Thus, ensure that the wrong side is facing outwards.
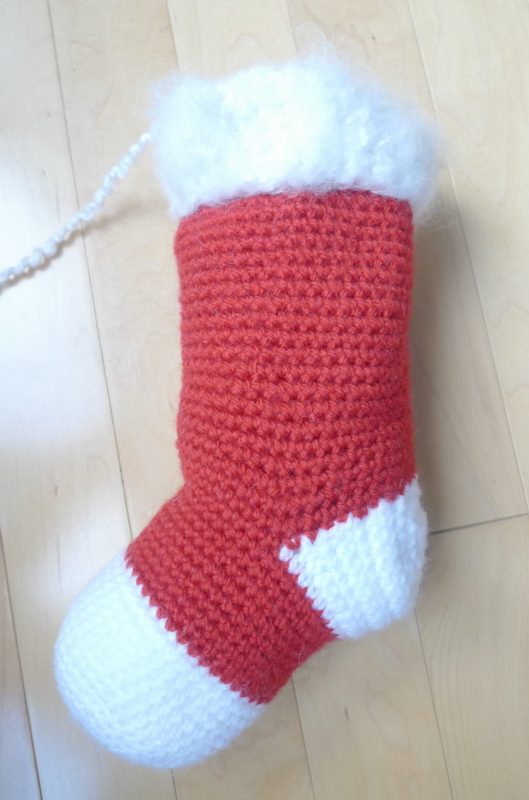
Sew fuzzy rim to top of stocking so that first round of fuzzy rim overlaps with last round of red stocking.
Optional: Use dog slicker brush to brush the yarn to make it even fuzzier.
Stuff stocking with fiberfill to help it keep its rounded shape.
CAT
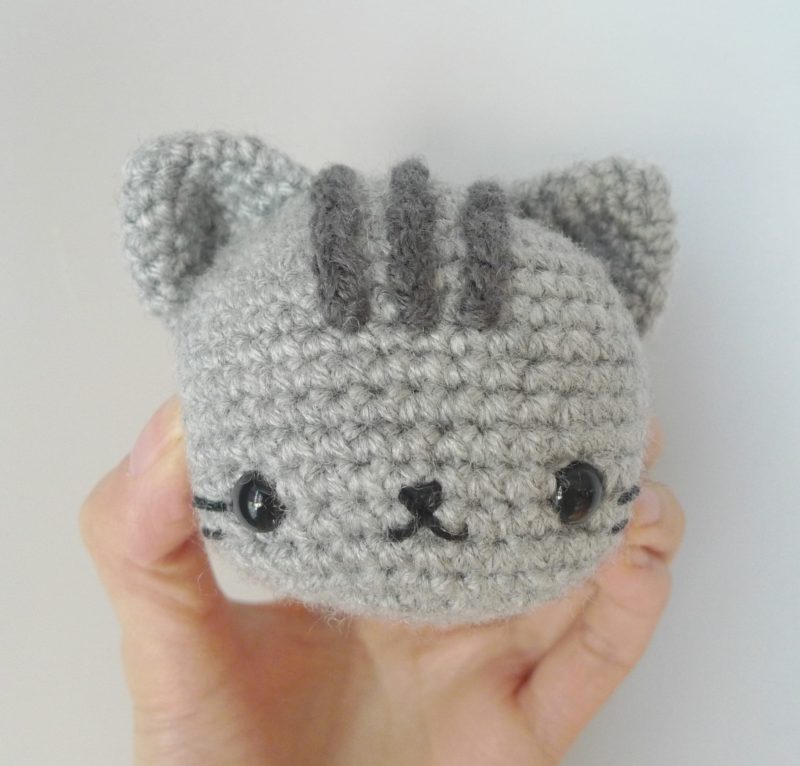
Head
Using light grey yarn and 2.75 mm hook,
Chain 7 (this is the foundation chain).
Round 1: Starting from second chain from hook, Sc 6 in back loops of foundation chain. Turn and Sc 6 in front loops of the foundation chain [we are making an oval by crocheting around the chain]. (12 sts)
R2: Inc, Sc 4, Inc x 2, Sc 4, Inc. (16 sts)
R3: Inc x 2, Sc 5, Inc x 3, Sc 5, Inc. (22 sts)
R4: Inc x 3, Sc 7, Inc x 3, Sc 9. (28 sts)
R5: Sc 1, Inc x 3, Sc 11, Inc x 3, Sc 10. (34 sts)
R6: Sc 2, Sc 4, Inc, rep 6 times, Sc 2. (40 sts)
R7-16: Sc 40
R17: Sc 3, dec, rep 8 times. (32 sts)
Insert 9 mm safety eyes between rounds 13 and 14, 8 stitches apart. Embroider nose and whiskers using black embroidery floss or thin cotton yarn. Embroider nose between rounds 13 and 14. Embroider 2 whiskers on each side between Rounds 13/14 and 14/15 Begin stuffing head.
R18: Sc 2, dec, rep 8 times. (24 sts)
R19: Sc 2, dec, rep 6 times. (18 sts).
R20: Sc 1, dec, rep 6 times. (12 sts)
Continue stuffing.
R21: Dec, rep 6 times. (6 sts)
Fasten off.
Stripes (Make 3)
Using dark grey yarn and 2.75 mm hook,
Chain 18. Fasten off and leave long end for sewing. Each stripe measured 3.15″/8 cm . Sew stripes on top of cat’s head using tapestry needle. We placed them so that the fronts of the stripes are located between Rounds 8 and 9.
Ears (Make 2)
Using light grey yarn and 2.75 mm hook,
Round 1: 4 sc in Magic Ring.
R2: Inc, rep 4 times. (8 sts)
R3: Sc 1, Inc, rep 4 times. (12 sts)
R4: Sc 3, Inc, rep 3 times. (15 sts)
R5: Sc 4, Inc, rep 3 times. (18 sts)
R6: Sc 5, Inc, rep 3 times. (21 sts)
Fasten off and leave long end for sewing. Cut triangles out of pink felt and hot glue onto ears as lining. Sew ears onto head of cat.
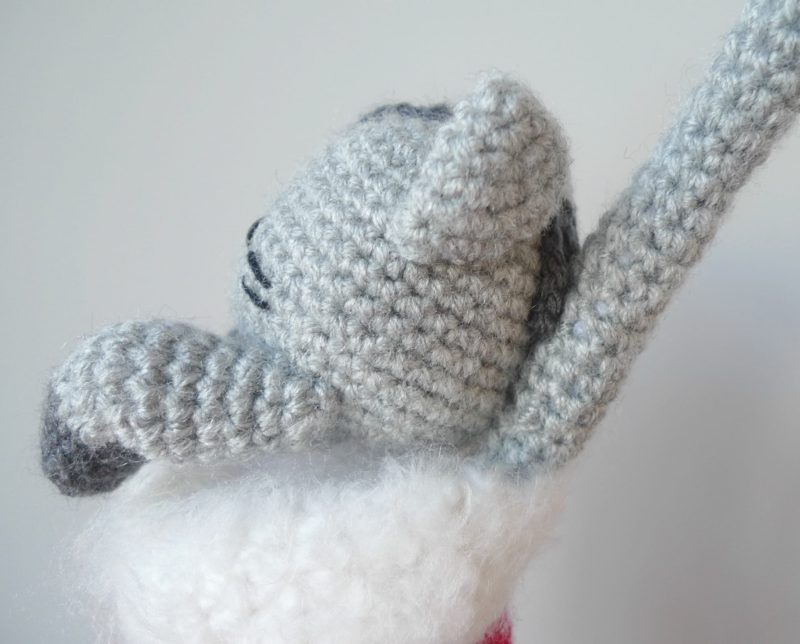
Arms (Make 2)
Using dark grey yarn and 2.75 mm hook,
Round 1: 5 sc in Magic Ring. (5 sts)
R2: Inc, rep 5 times. (10 sts)
Optional: Embroider three black lines onto paws to form claws after Round 3.
R3-5: Sc 10 (10 sts).
Switch to light grey yarn,
R6-14: Sc 10 (10 sts)
Fasten off and leave long end for sewing. Cut decorative floral wiring and bend tip. Insert into arm so that bent tip is at paw. Gently stuff.
Attach onto bottom of cat’s head as pictured below.
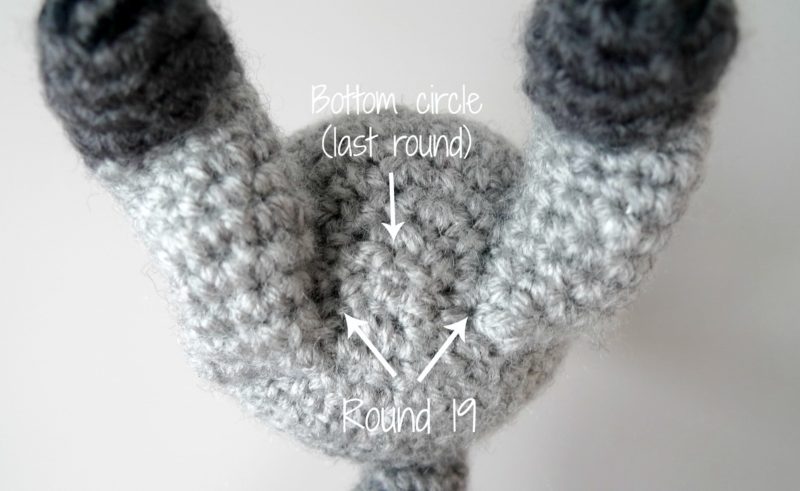
Shape arms into S curve.
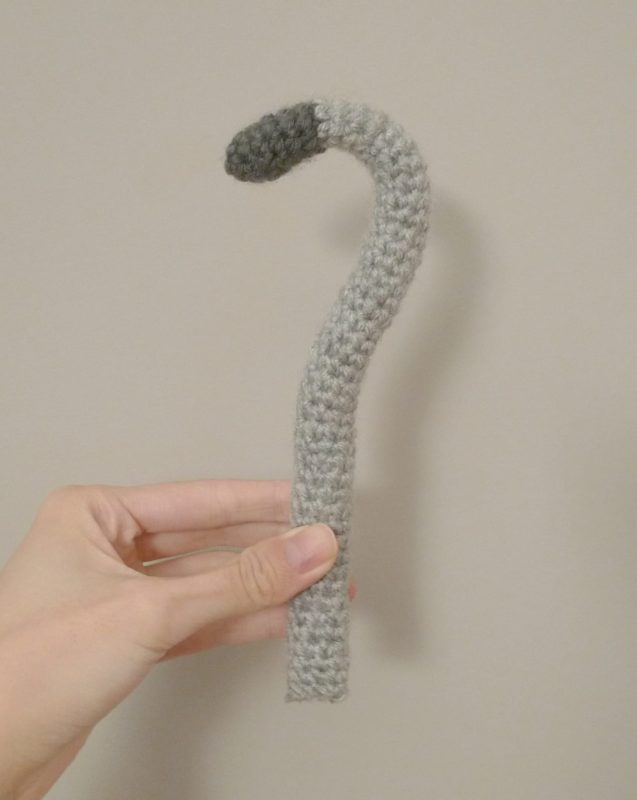
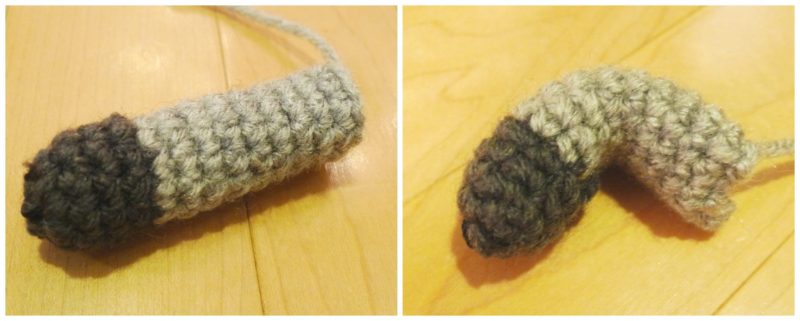
Tail
Using dark grey yarn and 2.75 mm hook,
Round 1: 4 sc in Magic Ring (4 sts).
R2: Inc, rep 4 times (8 sts).
R3-7: Sc 8 (8 sts).
Stuff lightly as you go.
Switch to light grey yarn,
R8-47: Sc 8 (8 sts)
My finished tail measured 10.5″/26.7 cm. Keep adding rounds to desired length.
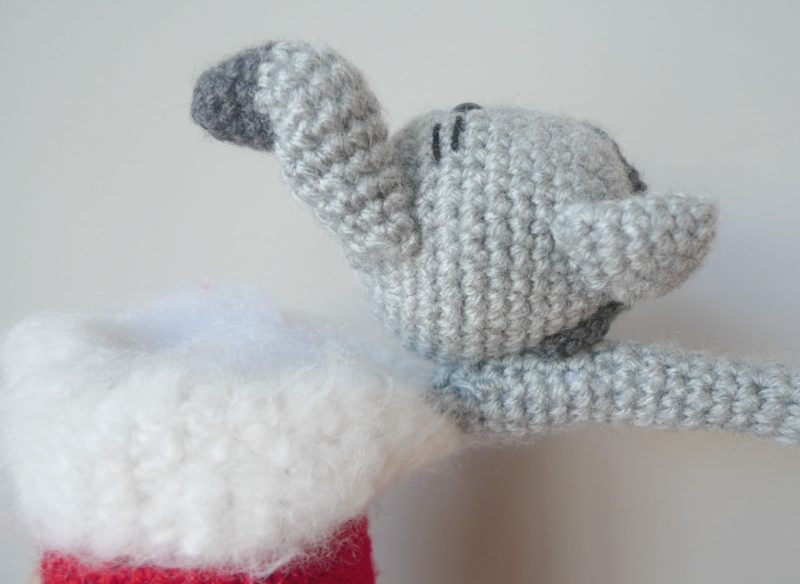
Assembly
Fasten off and leave long end for sewing. Cut decorative floral wire and insert into tail.
Attach 1.25″/3 cm of tail to inside of stocking using fuzzy white yarn (so that seam is not visible from outside of stocking).
Carefully position cat’s head onto tail and attach 1.5″/3.8 cm together using grey yarn.
Check to make sure that the cat’s head and arms will cover the opening of the stocking at resting position.
Cat’s head should be able to pivot up and down so that items can be placed in the stocking.