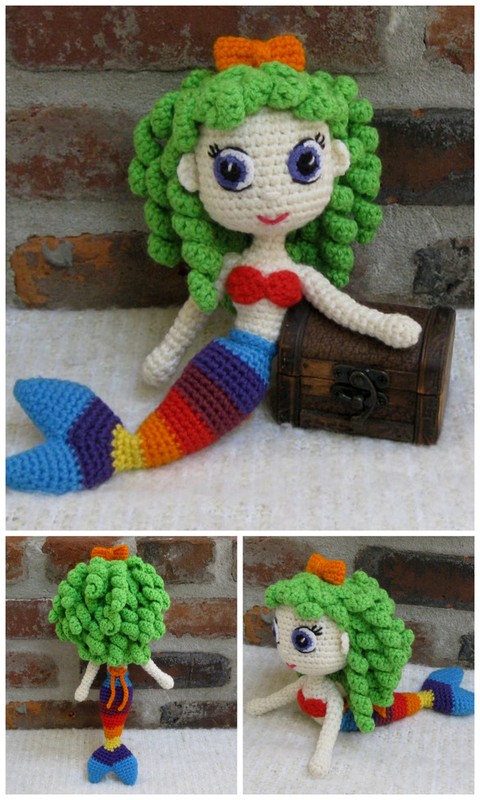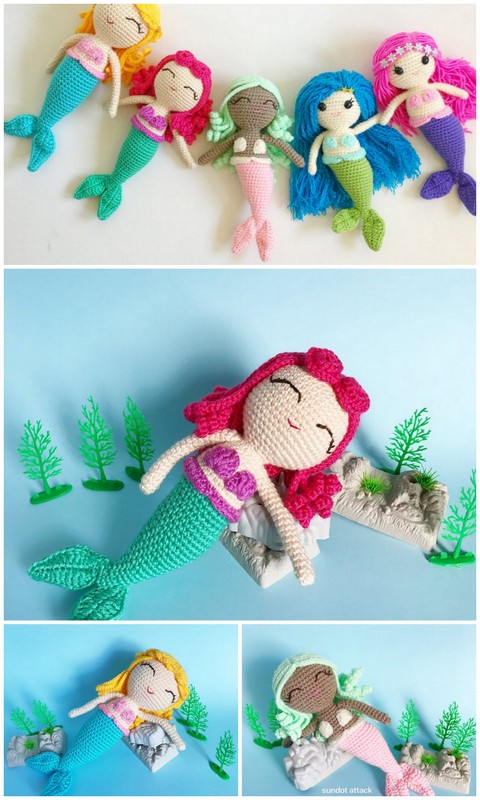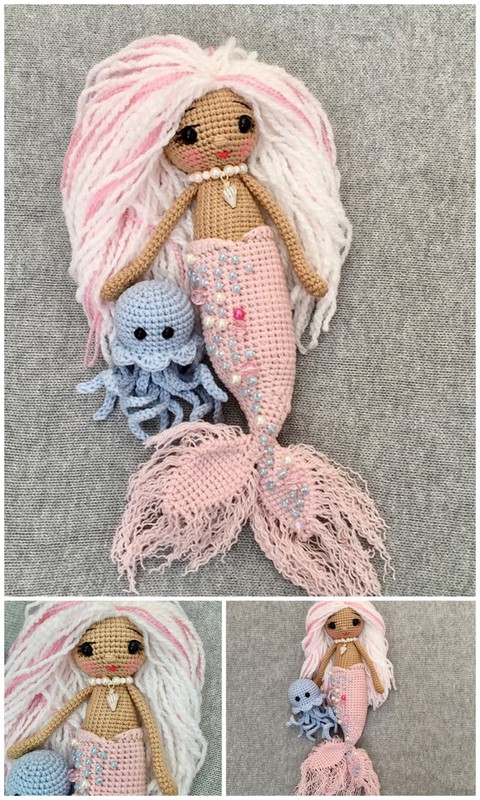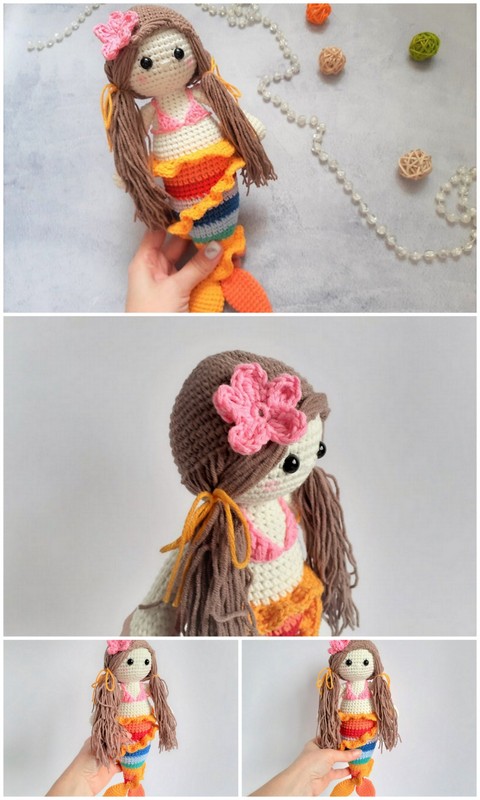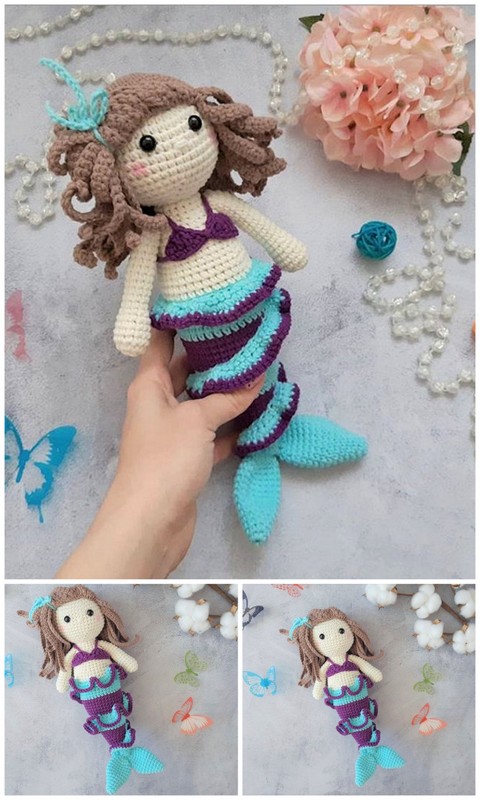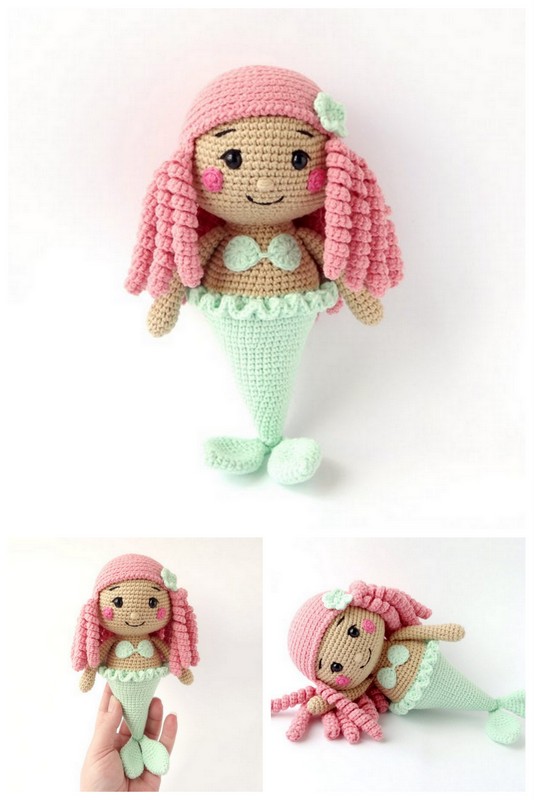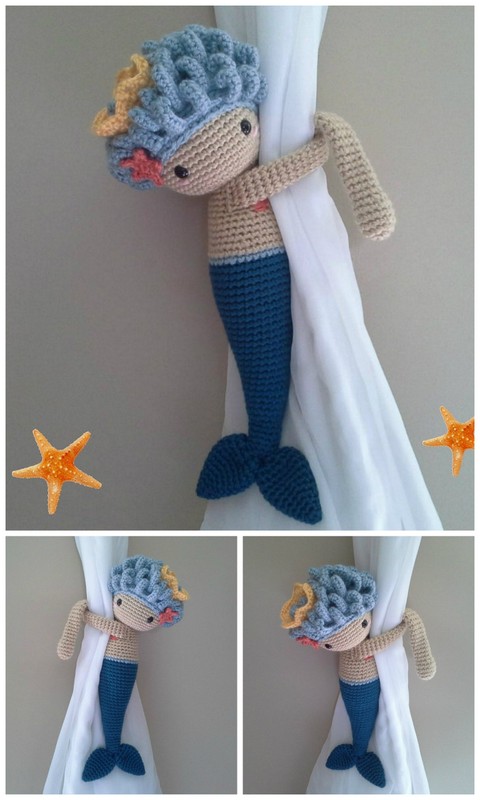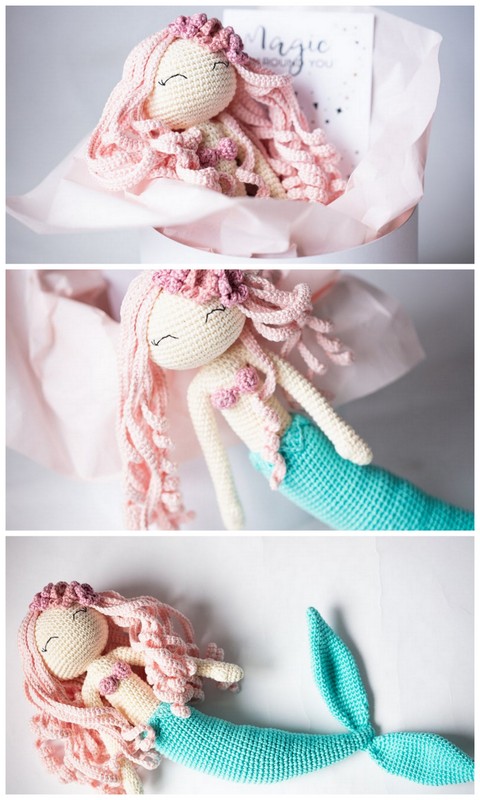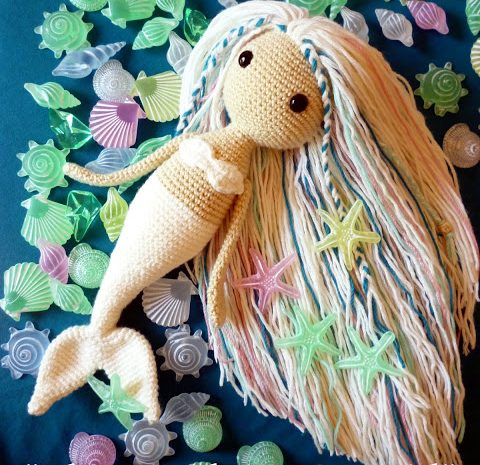
Amigurumi Cute Mermaid Free Crochet Patterns
Hello dear visitors, I am here again with new amigurumi molds for you. I am sharing amigurumi patterns for you here for free. You can make your children happy by making these patterns. Amigurumi toys are very popular lately and are the most beautiful toys that don’t harm your kids. Your kids will love them. Let’s move on to our pattern and give them this gift.
You will need
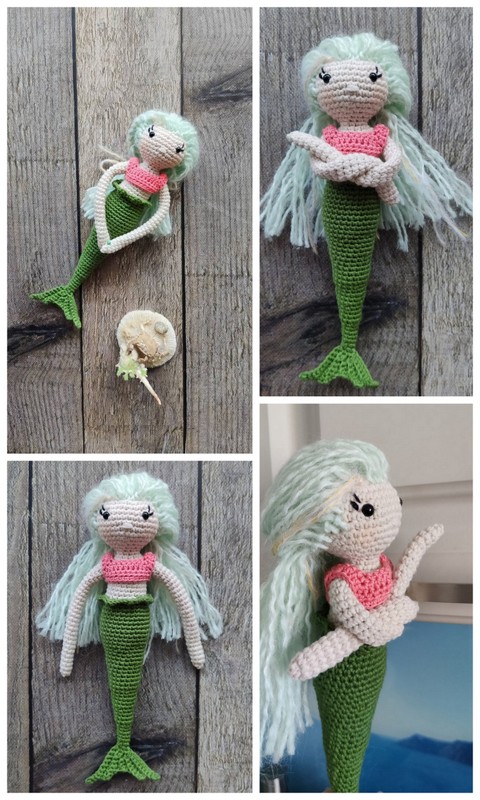
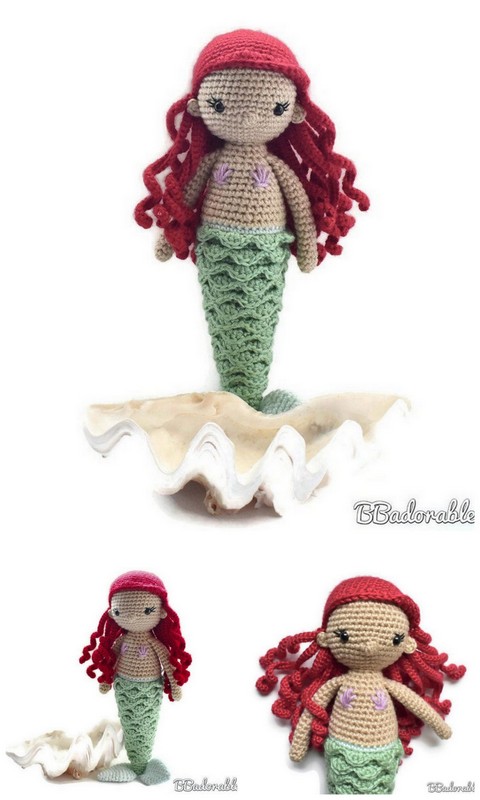
Yarn (cotton, acrylic, wool…) in colour: A (for skin tone); B (white) for the tail and the bra; C (green, aqua, white…) for the hair… or the colours you prefer.
Crochet hook in accordance with the yarn you’ll use. I usually prefer to use a smaller thickness crochet than indicated by the thread label.
Stitch marker.
Fiberfill for stuffing.
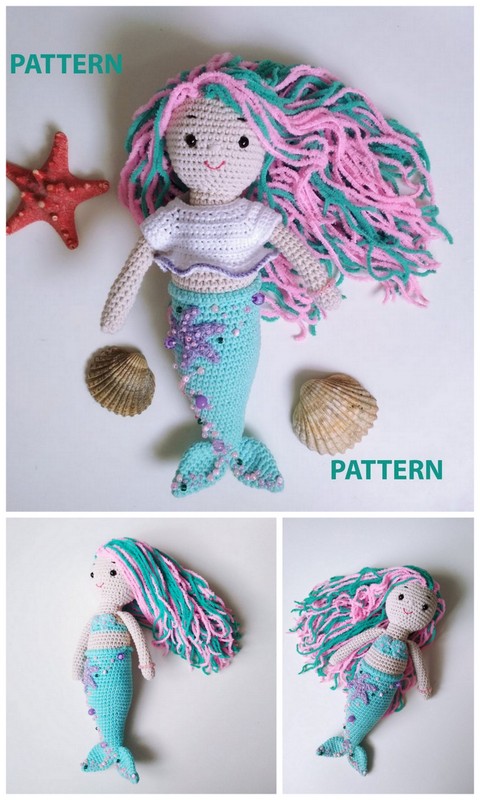
Some beads to decorate (optional).
Yarn needle.
Safety eyes (10 mm).
Abbreviations
ch: chain
mr: magic ring
sc: single crochet
sl st: slip stitch
dc: double crochet
hdc: half double crochet
st(s): stitch(es)
rep: repeat
inc: increase (make two single crochet in the same stitch)
dec: decrease (sc2tog)
rnd: round
Note
In this pattern, I’ve worked in spiral (continuous rounds).
Head, body, tail and fins are one piece. The arms and the bra are woven apart and sewn afterwards.
The thread, wool, acrylic, cotton yarn … is at your choice, adapting the hook to the thickness and to your way to weave (looser or tighter). Remember that with another thread and hook, mermaid’s final size will change .
The number in brackets at the end of each line means the number of stitches you should have, for example (6).
Head, Body, Tail and Fins (One Pieces)
In colour A, start working the head.
Rnd 1: start 6 sc in a magic ring (6)
Rnd 2: inc 6 times (12)
Rnd 3: (sc in next stitch, inc in next stitch) repeat 6 times (18)
Rnd 4: (sc in next 2 st, inc in next st) repeat 6 times (24)
Rnd 5: (sc in next 3 st, inc in next st) repeat 6 times (30)
Rnd 6: (sc in next 4 st, inc in next st) repeat 6 times (36)
Rnd 7: (sc in next 5 st, inc in next st) repeat 6 times (42)
Rnd 8. sc in all 42 st (42)
Rnd 9: (sc in next 6 st, inc in next st) repeat 6 times (48)
Rnd 10-11: sc in all 48 st (48)
Rnd 12: sc in next 7 st, inc in next st) repeat 6 times (54)
Rnd 13-19: sc in all 54 st (54)
Rnd 20: (sc in next 7 st, dec ) repeat 6 times (48)
Rnd 21: sc in all 48 st (48)
Rnd 22: (sc in next 6 st, dec ) repeat 6 times (42)
Rnd 23: (sc in next 5 st, dec ) repeat 6 times (36)
Rnd 24: (sc in next 4 st, dec ) repeat 6 times (30)
Insert safety eyes between rounds 14 and 15, with an interspace of 8 stitches.
Rnd 25: (sc in next 3 st, dec ) repeat 6 times (24)
Rnd 26: (sc in next 2 st, dec ) repeat 6 times (18)
Rnd 27: (sc in next 2 st, dec ) repeat 4 times, 2 sc (14)
Rnd 28: sc in all 14 st (14)
Stuff the head with fiberfill. Don’t cut the yarn and continue making the neck and the body.
Rnd 29: (sc in next 2 st, inc in next st) repeat 4 times, 2 sc (18)
Rnd 30: sc in all 18 st (18)
Rnd 31: (sc in next 2 st, inc in next st) repeat 6 times (24)
Rnd 32: sc in all 24 st (24)
Rnd 33: (sc in next 3 st, inc in next st) repeat 6 times (30)
Rnd 34: sc in all 30 st (30)
Rnd 35: (sc in next 4 st, inc in next st) repeat 6 times (36)
Rnd 36-42: sc in all 36 st (36)
Rnd 43: (sc in next 5 st, inc in next st) repeat 6 times (42)
Rnd 44: sc in all 42 st (42)
Change to colour B. You must stuffing firmly the neck and continue stuffing as you go. Continue making the tail.
Rnd 45-52: sc in all 42 st (42)
Rnd 53: (sc in next 5 st, dec ) repeat 6 times (36)
Rnd 54-55: sc in all 36 st (36)
Rnd 56: (sc in next 4 st, dec ) repeat 6 times (30)
Rnd 57-58: sc in all 30 st (30)
Rnd 59: (sc in next 3 st, dec ) repeat 6 times (24)
Rnd 60-61: sc in all 24 st (24)
Rnd 62: (sc in next 2 st, dec ) repeat 6 times (18)
Rnd 63-66: sc in all 18 st (18)
Rnd 67: (sc in next 1 st, dec ) repeat 6 times (12)
Rnd 68-74: sc in all 12 st (12)
Rnd 75: (sc in next stitch, inc in next st) repeat 6 times (18)
Rnd 76: (sc in next st, inc in next st) repeat 9 times (27)
Rnd 77: (sc in next st, inc in next st) repeat 13 times, sc next st. (40)
Rnd 78-79: sc in all 40 st (40)
Stuff the tail.
To continue making the fins, we must divide the 40 stitches of the last round into two parts, because we’re going working the two parts separately. There should be 20 stitches in each part. Note that we aren’t going to stuff the fins.
The first fin.
Rnd 80-85: sc in all 20 st (20)
Rnd 86: (sc in next 3 st, dec ) repeat 4 times (16)
Rnd 87: sc in all 16 st (16)
Rnd 88: (sc in next 2 st, dec ) repeat 4 times (12)
Rnd 89: sc in all 12 st (12)
Rnd 90: (sc in next st, dec ) repeat 4 times (8)
Rnd 91-93: sc in all 8 st (8)
Fasten off.
The second fin.
It’s just like the first one.
The arms (Make 2)
In colour A…
Rnd 1: start 6 sc in a magic ring (6)
Rnd 2: (sc in next 2 st, inc in next st) repeat 2 times (8)
Rnd 3: (sc in next 3 st, inc in next st) repeat 2 times (10)
Rnd 4-6: sc in all 10 st (10)
Rnd 7: (sc in next 3 st, dec) repeat 2 times (8)
Rnd 8-27: sc in all 8 st (8)
Rnd 28: (sc in next 2 st, dec ) repeat 2 times (6)
Fasten off. Do not stuff the arms. Sew them to the body at about round 34.
The Bra
In colour B. We are going to work the both sides of the foundation chain.
Start working 17 chains.
Rnd 1: Start in second chain from the hook: sl st in next 2 st(s), sc, chain one, hdc, chain, dc, hdc, sc, sl st in the next two st(s), sc, chain one, hdc, chain, dc, hdc, sc, sl st in the next two st(s), chain.
Continue on the other side of the foundation chain making the same what appear between **.
Fasten off and sew the bra to the body.
Hair
I give hair to my amigurumi dollies as you would if putting tassels in a scarf: I cut a piece of yarn which is double the length that I want the hair to be, I fold it in half and put the loopy end through a stitch in the top of the head, starting in the front of the head, where I want the part to be. I then put the end pieces through the loop and pull so they are right next to the head. Repeat to form a vertical line right in the middle of the head (or where you want the part to be).
Once I’m done with one side of the part I do the other side, making sure to put the second row of hair right next to the first one.After I’m done with the middle part, I move one of the middle parts all the way to the other side. I then do the same thing over and over so the whole head is covered by hair!