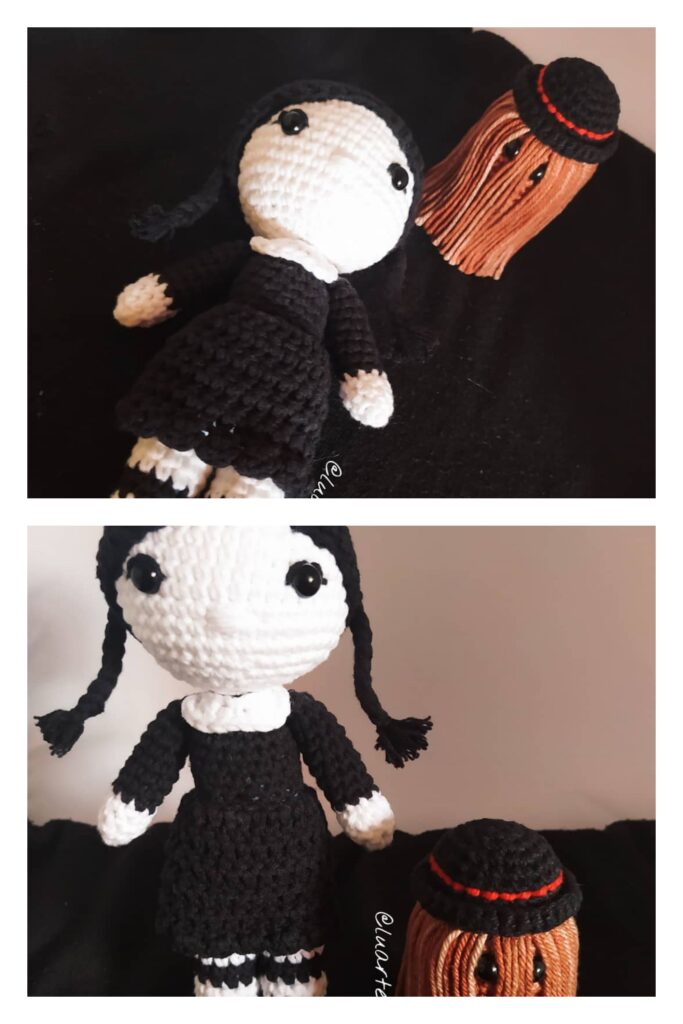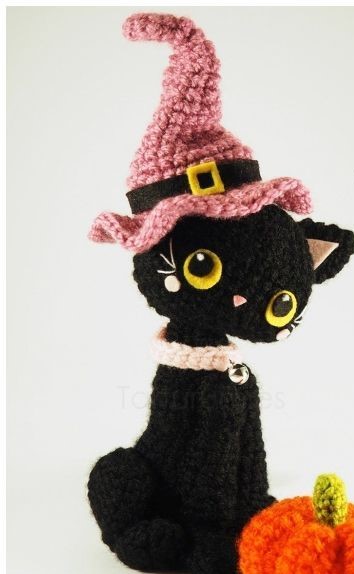
Amigurumi Halloween Cat Free Crochet Patterns
Hello dear visitors, I am here again with new amigurumi molds for you. I am sharing amigurumi patterns for you here for free. You can make your children happy by making these patterns. Amigurumi toys are very popular lately and are the most beautiful toys that don’t harm your kids. Your kids will love them. Let’s move on to our pattern and give them this gift.
You will need
Yarn (for crochet hooks 3 – 3.5 mm/ 2mm wide)
Colors: Light Pink – Lilac – Green – Orange – Black
Yarn (to embroider cat’s mustache)
Color: White
Felt
Colors: White – Light Pink – Yellow – Deep Pink – Black
Fiberfill (to stuff)
Textile Glue (for glue some parts of felt)
Jingle Bells (6mm diameter)
2mm Crochet Hook
2,5mm Crochet Hook
3,5mm Crochet Hook
Yarn Needle (for sew amigurumi parts)
Scissors – Pencil – Ruler
Abbreviations
ch = chain stitch
dec = decrease
FO = fasten off
inc = increase
mm = millimeter(s)
mr = magic ring
sc = single crochet
sl st = slip stitch
st = stitch
rep = repeat
rnd(s)= round(s) * * x…= repeat instructions in asterisks … times
Continuous round = Crochet all followed, without closing the rounds.
Joined round = Go closing every rounds and climb to the next turn with a chain.
Worked in Rows = Crochet in a base of chains and turning the crochet at the end each row.
Head
Worked in continuous round with black color and 3,5mm hook.
Round 1.- Magic Ring (6)
Round 2.- 6 inc. (12)
Round 3.- 1sc, 1inc x6 (18)
Round 4.- 2sc, 1inc x6 (24)
Round 5.- 3sc, 1inc x6 (30)
Round 6.- 4sc, 1inc x6 (36)
Rounds 7 – 11.- 1sc in each st (36)
Round 12.- 4sc, 1dec x6 (30)
Round 13.- 3sc, 1dec x6 (24)
Round 14.- 2sc, 1dec x6 (18)
Round 15.- 1sc, 1dec x6 (12)
Round 16.- 6 dec. (6)
Stuff the head as you crochet. FO, leaving a long tail.
Body
Worked in continuous round with black color and 3,5mm hook.
Round 1.- Magic Ring (6)
Round 2.- 6 inc. (12)
Round 3.- 1sc, 1inc x6 (18)
Round 4.- 2sc, 1inc x6 (24)
Rounds 5 – 11.- 1sc in each st (24)
Round 12.- 2sc, 1dec x6 (18)
Rounds 13 – 18.- 1sc in each st (18)
Round 19.- 1sc, 1dec x6 (12)
Rounds 20 – 23.- 1sc in each st (12)
Stuff the body as you crochet. FO, leaving a long tail.
Back Legs (Make 2)
Worked in joined round with black color and 3,5mm hook.
Round 1.- Magic Ring (6)
Round 2.- 6 inc. (12)
Rounds 3 – 7.- 1sc in each st (12)
Round 8.- 6 dec. (6)
Rounds 9 – 10.- 1sc in each st (6)
Round 11.- 6 inc. (12)
Rounds 12 – 13.- 1sc in each st (12)
Round 14.- 6 dec. (6)
Round 15.- 3 dec. (3)
Stuff the piece as you crochet. Fasten off, leaving a long tail. Don’t fill the thin side (that is, the ankle). In order to shape them into paws, starting at the bottom of the feet, bring the long yarn tail with the needle and go through to the other side of the foot (the top), turning the needle while inside and bringing the needle towards the same point where you started (the bottom) and continue to go through (adjusting as you go) and repeat the same procedure from the other side of the foot. Once both sides have been completed, go from the bottom of the paw all the way to the other side of the thigh. Turn it a little in order to fold the foot/paw. Don’t fasten off yet!
Front Legs (Make 2)
Worked in joined round with black color and 3,5mm hook.
Round 1.- Magic Ring (6)
Rounds 2 – 6.- 1sc in each st (6)
Round 7.- 1sc, 1inc x3 (9)
Rounds 8 – 13.- 1sc in each st (9)
Round 14.- 1sc, 1dec x3 (6)
Rounds 15 – 16.- 1sc in each st (6)
Round 17.- 6 inc. (12)
Round 18 – 19.- 1sc in each st (12)
Round 20.- 6 dec. (6)
Round 21.- 3 dec. (3)
Stuff the piece as you crochet. Fasten off, leaving a long tail. In order to shape them into paws, starting at the bottom of the feet, bring the long yarn tail with the needle and go through to the other side of the foot (the top), turning the needle while inside and bringing the needle towards the same point where you started (the bottom) and continue to go through (adjusting as you go) and repeat the same procedure from the other side of the foot. Once both sides have been completed, go from the bottom of the paw all the way back to the very top of the foot/paw. Turn it a little in order to fold the paw. Don’t fasten off yet!
Ears (Make 2)
Worked in joined round with black color and 2,5mm hook.
Round 1.- Magic Ring (3)
Round 2.- 3 inc. (6)
Round 3.- 1sc, 1inc x3 (9)
Round 4.- 2sc, 1inc x3 (12)
Round 5.- 1sc in each st (12)
Don’t stuff. FO, leaving a long tail.
Tail
Worked in joined round with black color and 3,5mm hook.
Round 1.- Magic Ring (6)
Round 2.- 1sc, 1inc x3 (9)
Rounds 3 – 7.- 1sc in each st (9)
Round 8.- 1sc, 1dec x3 (6)
Rounds 9 – 24.- 1sc in each st (6)
Stuff the tail as you crochet. FO, leaving a long tail.
Overflow
Worked in row with light pink color and 2mm hook.
Start with 20ch + 1ch to climb (21)
Row 1.- 1sc in each st (20)
Fasten off, leaving a long tail. Sew the bell on to sc #10 (in the middle of the overflow). Don’t sew the ends together yet!
Felt Parts
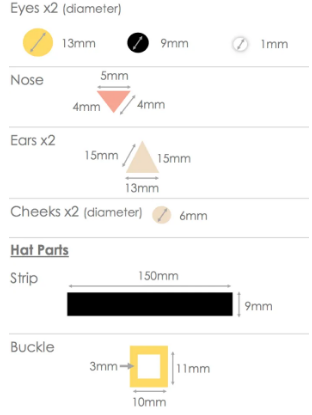
Hat
Worked in continuous round with lilac color and 3,5mm hook.
Round 1.- Magic Ring (3)
Round 2.- 3 inc. (6)
Rounds 3 – 6.- 1sc in each st (6)
Round 7.- 1sc, 1inc x3 (9)
Rounds 8 – 10.- 1sc in each st (9)
Round 11.- 2sc, 1inc x3 (12)
Rounds 12 – 13.- 1sc in each st (12)
Round 14.- 1sc, 1inc x6 (18)
Round 15.- 1sc in each st (18)
Round 16.- 2sc, 1inc x6 (24)
Round 17.- 3sc, 1inc x6 (30)
Round 18.- 3sc, 1dec x6 (24)
Round 19.- 2sc, 1dec x6 (18)
Round 20.- 2sc, 1inc x6 (24)
Round 21.- 3sc, 1inc x6 (30)
Round 22.- 30 inc. (60)
Round 23.- 1sc in each st (60)
Don’t stuff. FO. Place the band around the hat and put the buckle centered with the tallest part facing vertically . Form the hat to your preference!
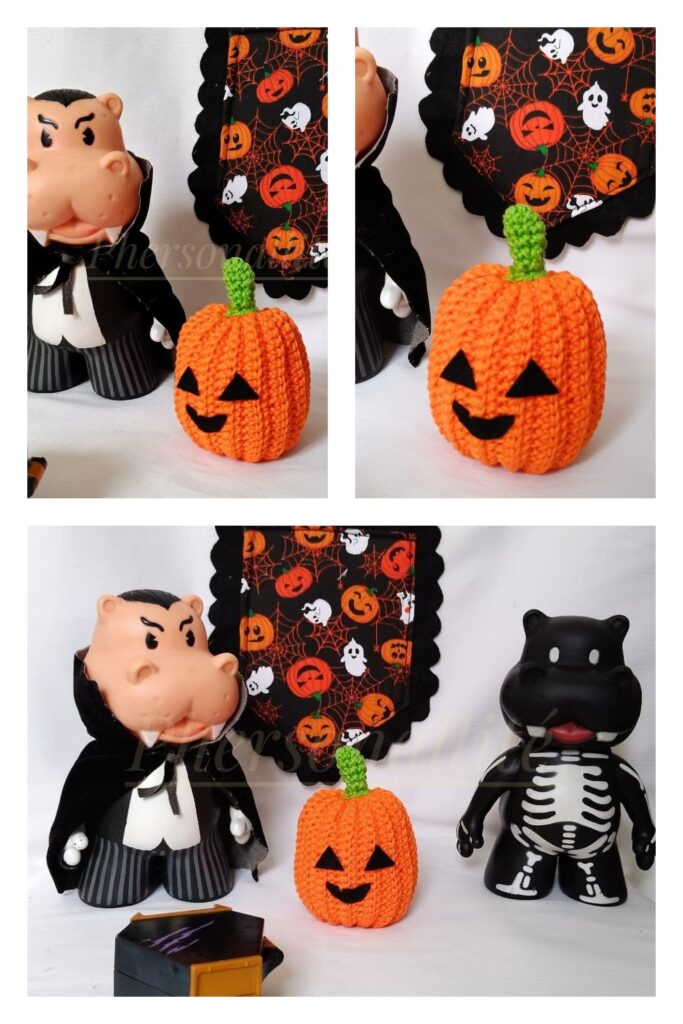
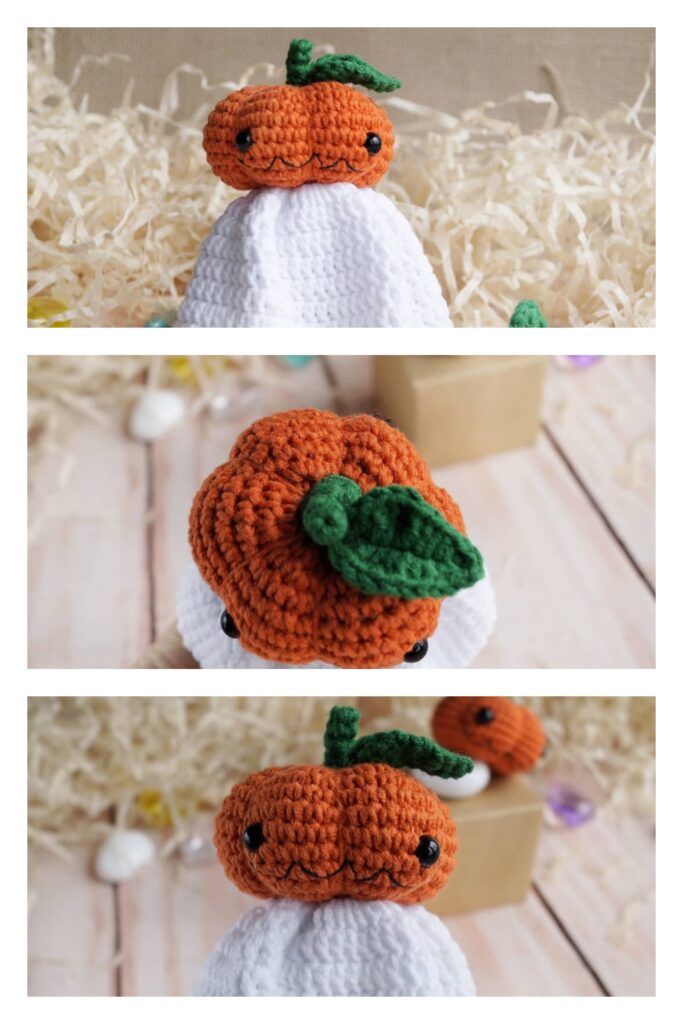
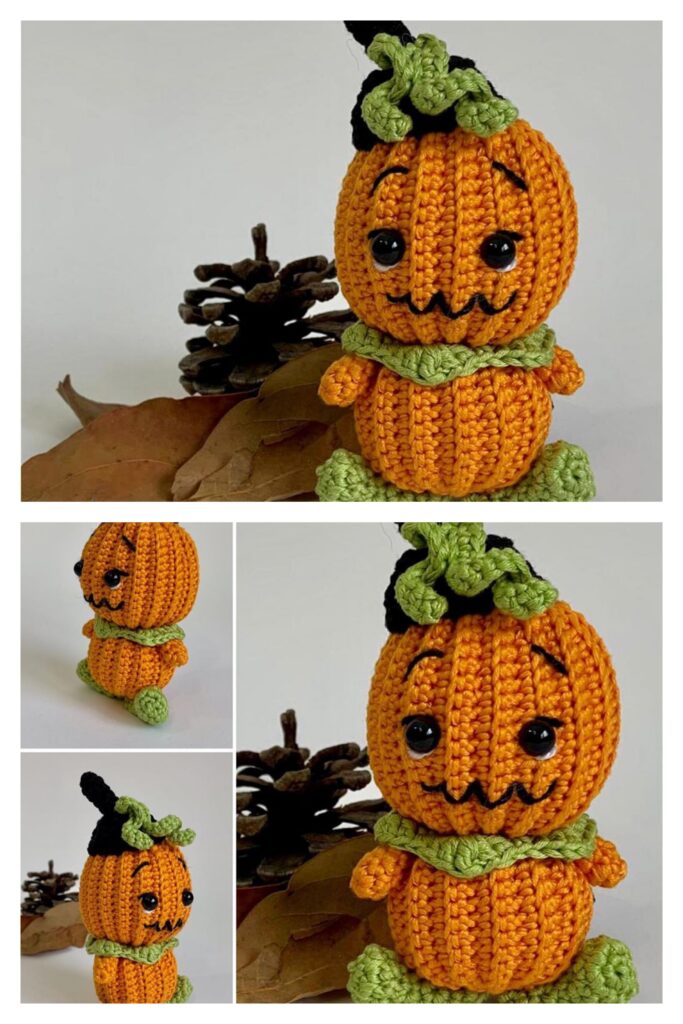
Pumpkin
BODY -Worked in joined round with orange color and 3,5mm hook.
Round 1.- Magic Ring (6)
Round 2.- 6 inc. (12)
Round 3.- 1sc, 1inc x6 (18)
Round 4.- 2sc, 1inc x6 (24)
Round 5.- 3sc, 1inc x6 (30)
Rounds 6 – 12.- 1sc in each st (30)
Round 13.- 3sc, 1dec x6 (24)
Round 14.- 2sc, 1dec x6 (18)
Round 15.- 1sc, 1dec x6 (12)
Round 16.- 6 dec. (6)
STEM – Worked in joined round with green color and 2mm hook.
Round 1.- Magic Ring (6)
Rounds 2 -5.- 1sc in each st (6)
Round 6.- 6 inc. (12)
The body of the pumpkin: Continue stuffing as you go along and push the stuffing towards the sides, leaving the center a bit more empty so that you can push it in a little at the top. Fasten off, leaving a pretty long tail. With this same tail we’re going to create the segments. With the yarn, go through the center and pierce through the base, turning towards the bottom so that a small cavity is formed in the center of the pumpkin (where we’re later going to put the stem). Pull the tail out and then put it through the center at the top, going through the base and repeat this in the same place once more (tighten the two stitches well to make sure that they accommodate both the stuffing and the segments. Repeat this 6 times, dividing the pumpkin into 6 segments. FO. The stem: Don’t stuff. FO, leaving a long tail, and use that tail to sew it into the space at the top of the pumpkin. FO.
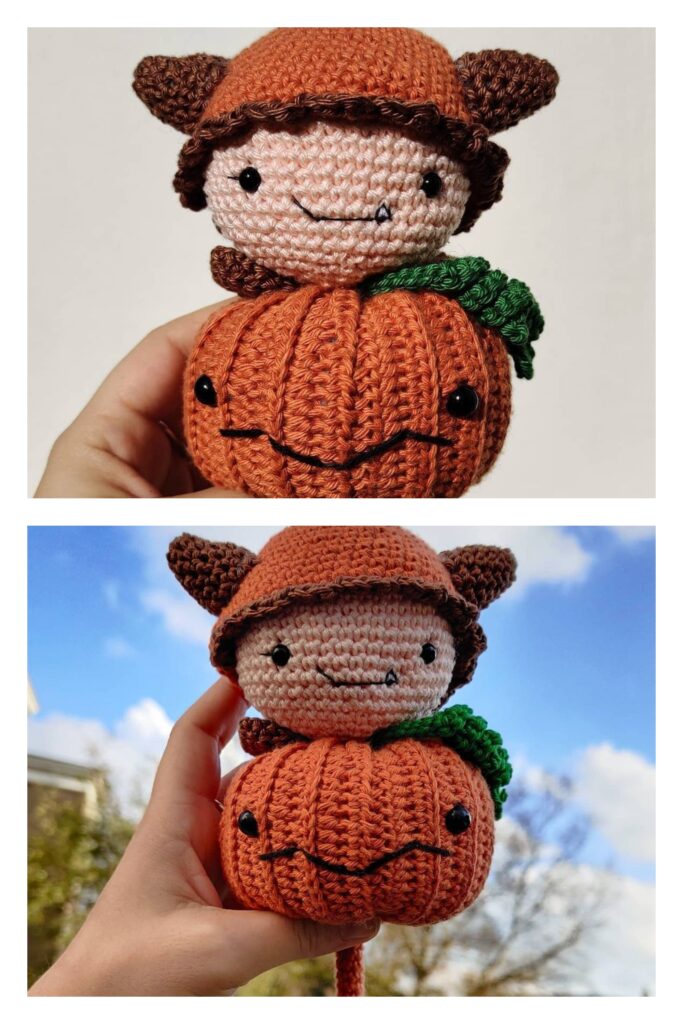
Assemble Kitten
1.- Sew the ears to the head between rows 3 and 7 (counting from the top).
2.- Assemble the eyes, gluing the pieces together and then glue them to the head between rows 10 and 12 (counting from the top) and leaving 4sc. of distance between them.
3.- Glue the nose to the head at row 12 (counting from the top) and centering them in relation to the eyes.
4.- Glue the cheeks to the head between rows 11 and 12 (counting from the top), one to each side of the attached eyes.
5.- Glue the interior triangles to the attached ears .
6.- Embroider the whiskers with white thread to the head between rows 9 and 11 (counting from the top) to sides of both eyes.
7.- Sew the back legs to the body between rows 5 and 10 (counting from the bottom). Sew, following the thigh to the side (don’t sew the feet, leave them loose and fold them a bit to form the leg like shape).
8.- Sew the front legs to the body between rows 5 and 18 (counting from the top), one next to the other (don’t sew the feet, leave them loose and fold them a bit to form them into legs).
9.- Sew the tail to the body between rows 5 and 6 (counting from the bottom) and centering it in relation to the back legs.
10.- Sew the head to the body, centered.
11.- Place the collar on the neck with the jingle bell towards the front and sew the ends together in the back.
12.- Finally, place the hat on top, and if you’d like it there permanently, sew it there!
NOTE : If you don’t want to glue the pieces of felt, you can sew them as an alternative!
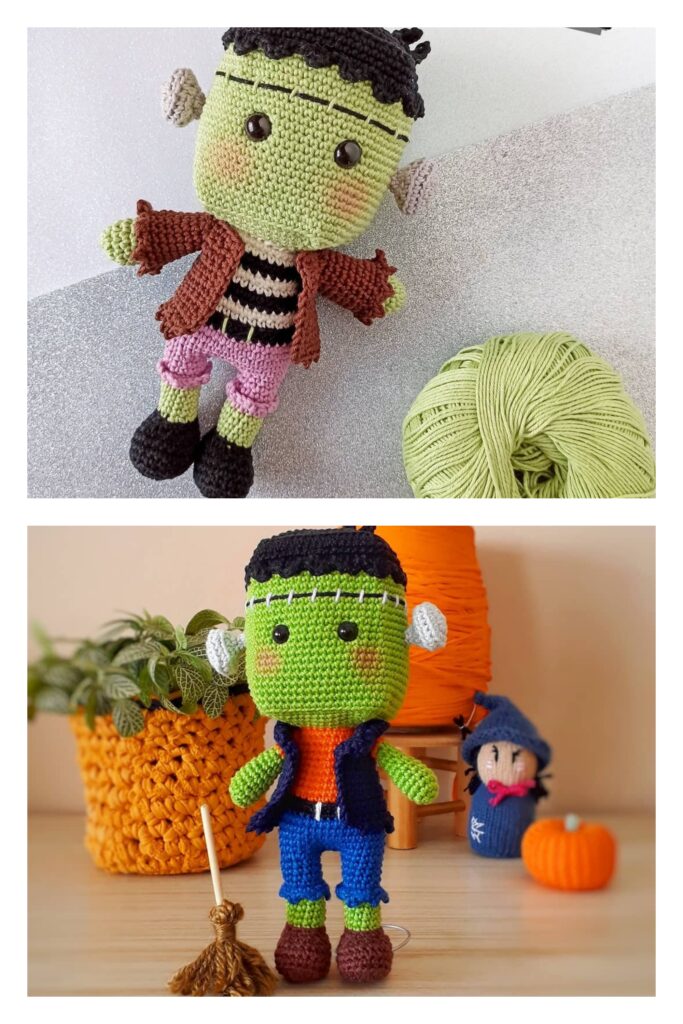
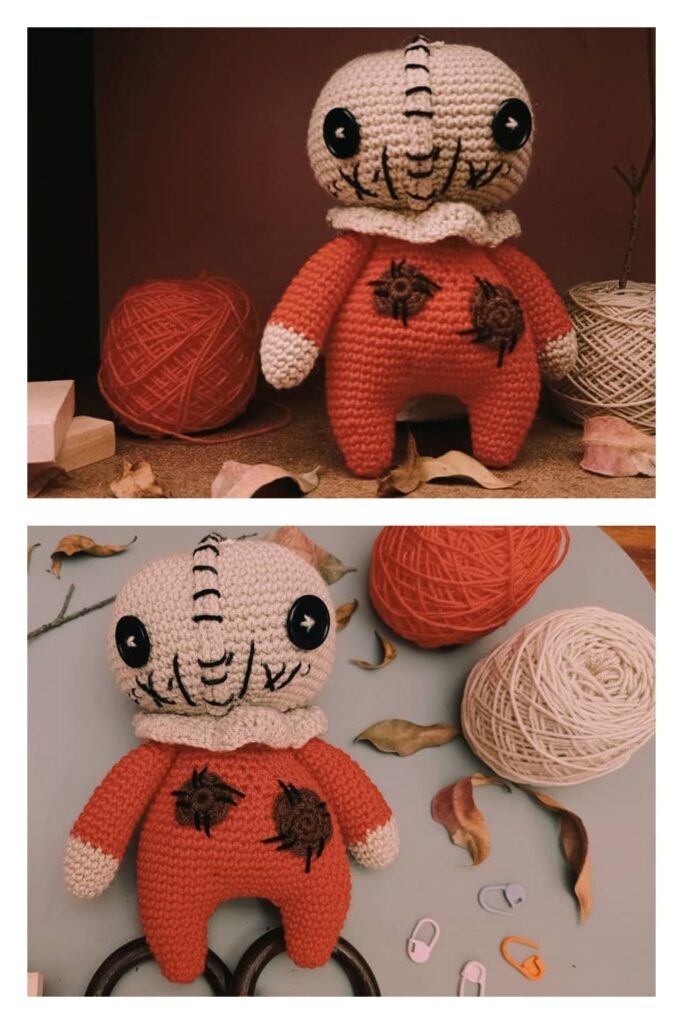
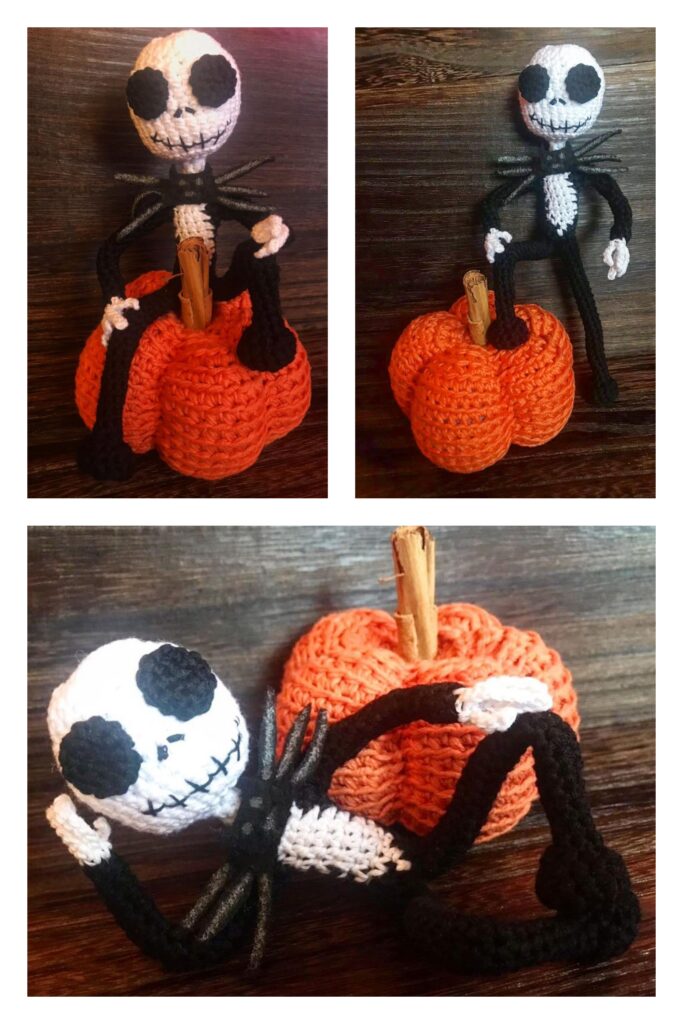
More Amigurumi Halloween Ideas