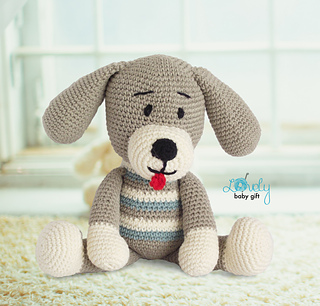
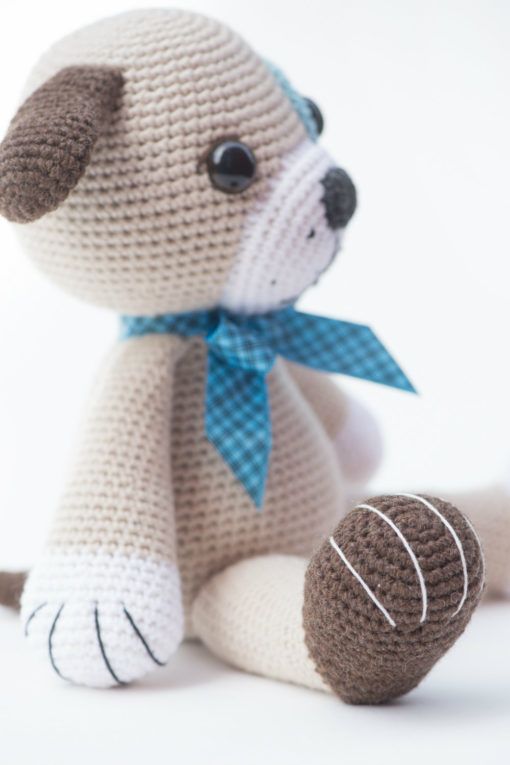
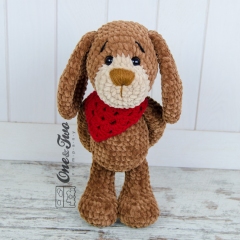
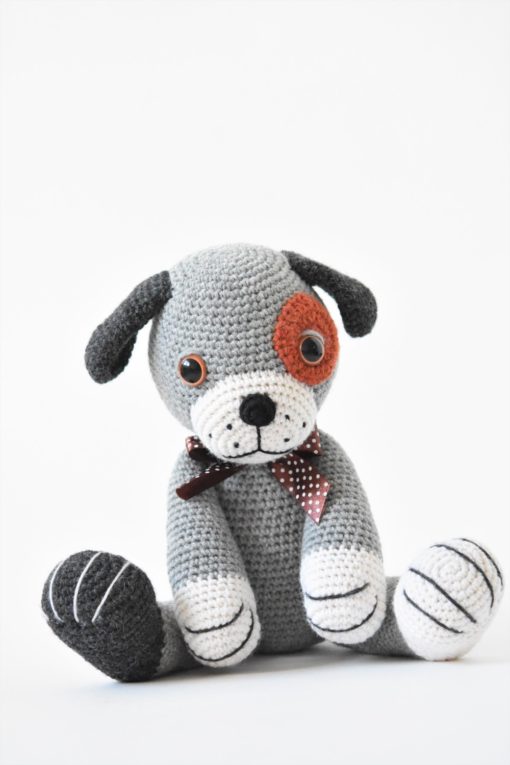
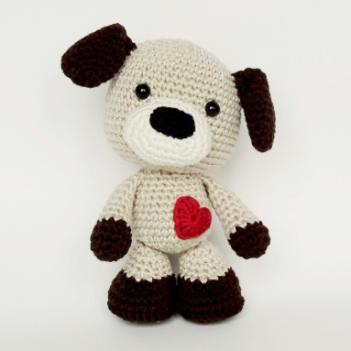
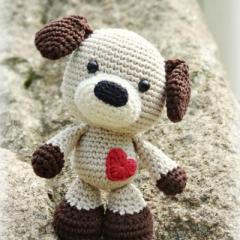
Amigurumi Puppy Free Crochet Patterns
Hello dear visitors, I am here again with new amigurumi molds for you. I am sharing amigurumi patterns for you here for free. You can make your children happy by making these patterns. Amigurumi toys are very popular lately and are the most beautiful toys that don’t harm your kids. Your kids will love them. Let’s move on to our pattern and give them this gift.
You will need
Berroco Comfort worsted weight yarn in three colours.
Pearl Color A: (approx. 115 yards)
Liquorice Color B: (approx. 75 yards)
Seedling Color C: (approx. 3 yards)
Size F/5 – 3.75mm Crochet Hook
Safety Eyes or buttons (if you are making this for a very small child it is safest to embroider on the eyes).
Scissors
Stitch Marker or scrap piece of yarn
Poly-Fil for stuffing the puppy
Yarn or tapestry needle to sew the pieces together
Abbreviations
SC: Single Crochet
ST: Stitch
SC2Tog: Single Crochet Two Together
Notes Before you Start
I worked my single crochets in the back loop to make it easier to count my rows and I personally just like the way it looks.
Work your rounds in spirals, do not join at the beginning of each round. You will need to use a stitch marker to mark your rounds.
Each round has the total number of stitches for the round in brackets. If you are unsure its always a good idea to count your stitches.
Head and Body
With Color A, make a magic circle or adjustable ring
Round 1: Make 6 SC in magic circle (6 St).
Round 2: SC twice in each stitch (12 St).
Round 3: *SC twice in next stitch, SC in next stitch. Repeat from * until end of round (18 St).
Round 4: *SC twice in next stitch, SC in next 2 stitches. Repeat from * until end of round (24 St).
Round 5: *SC twice in next stitch, SC in next 3 stitches. Repeat from * until end of round (30 St).
Round 6: *SC twice in next stitch, SC in next 4 stitches. Repeat from * until end of round (36 St).
Round 7: *SC twice in next stitch, SC in next 5 stitches. Repeat from * until end of round (42 St).
Round 8: *SC twice in next stitch, SC in next 6 stitches. Repeat from * until end of round (48 St).
Rounds 9-15: SC in each stitch (48 St).
Round 16: *SC2Tog, SC in next 6 stitches. Repeat from * to end of round (42 St).
Round 17: *SC2Tog, SC in next 5 stitches. Repeat from * to end of round (36 St).
Round 18: *SC2Tog, SC in next 4 stitches. Repeat from * to end of round (30 St).
Round 19: *SC2Tog, SC in next 3 stitches. Repeat from * to end of round (24 St).
Round 20: *SC2Tog, SC in next 2 stitches. Repeat from * to end of round (18 St).
Attach the eyes between rounds 10 and 11. Space them 7 stitches apart. Stuff the head with the poly-fil and continue on to the next round where we start to work the body.
Switch to Color C (for collar)
Round 21: SC in each stitch (18 St).
Round 22: *SC twice in next stitch, SC in next 2 stitches. Repeat from * until end of round (24 St).
Switch back to Color A
Round 23: *SC twice in next stitch, SC in next 3 stitches. Repeat from * until end of round (30 St).
Round 24: *SC twice in next stitch, SC in next 4 stitches. Repeat from * until end of round (36 St).
Round 25 – 30: SC in each stitch (36 St).
Round 31: *SC2Tog, SC in next 4 stitches. Repeat from * to end of round (30 St).
Round 32: *SC2Tog, SC in next 3 stitches. Repeat from * to end of round (24 St).
Round 33: *SC2Tog, SC in next 2 stitches. Repeat from * to end of round (18 St).
Round 34: *SC2Tog, SC in next stitch. Repeat from * to end of round (12 St).
Stuff the body with poly-fil.
Round 35: *SC2Tog. Repeat from * to end of round (6 St).
Round 36: SC next stitch and 4th stitch together, leaving remaining stitches unworked (1 St). Fasten off and pull yarn into the body of the puppy using crochet hook (to hide it).
Muzzle
This is the protruding part of the puppy’s face where his nose goes.
With Color A, make a magic circle or adjustable ring
Round 1: Make 6 SC in magic circle (6 St).
Round 2: SC twice in each stitch (12 St).
Round 3: *SC twice in next stitch, SC in next stitch. Repeat from * until end of round (18 St).
Round 4: *SC twice in next stitch, SC in next 2 stitches. Repeat from * until end of round (24 St).
Round 5: *SC twice in next stitch, SC in next 3 stitches. Repeat from * until end of round (30 St).
Round 6 – 8: SC in each stitch (30 St).
Fasten off (leave a few inches of yarn for sewing). Embroider on the nose as you would like it to look. You could also add a mouth but I thought it looked cute without.
Once you have added the nose, you will need to attach the muzzle to the face. I attached it with the top starting at row 11 and the bottom at row 19. You may want to pin it in place before you start to sew to make sure that it is spaced evenly. When you have just a few stitches left, stuff the muzzle with the poly-fil and then sew the remaining stitches. Secure with a knot and use the crochet hook to pull the loose end of yarn into the inside of the muzzle to hide it.
Ears
With color B, make a magic circle or adjustable ring
Round 1: Make 6 SC in magic circle (6 St).
Round 2: SC twice in each stitch (12 St).
Round 3: *SC twice in next stitch, SC in next stitch. Repeat from * until end of round (18 St).
Round 4: *SC twice in next stitch, SC in next 2 stitches. Repeat from * until end of round (24 St).
Round 5: *SC twice in next stitch, SC in next 3 stitches. Repeat from * until end of round (30 St).
Round 6-13: SC in each stitch (30 St).
Round 14: SC2Tog, SC in next 13 stitches, SC2Tog, SC to end of round (28 St).
Round 15: SC in each stitch (28 St).
Round 16: SC2Tog, SC in next 12 stitches, SC2Tog, SC to end of round (26 St).
Round 17: SC in each stitch (26 St).
Round 18: SC2Tog, SC in next 11 stitches, SC2Tog, SC to end of round (24 St).
Round 19: SC in each stitch (24 St).
Round 20: SC2Tog, SC in next 10 stitches, SC2Tog, SC to end of round (22 St).
Round 21: SC in each stitch (22 St).
Fasten off (leave a few inches of yarn for sewing). Do not stuff the ears. Attach the ears evenly spaced 4 rows down from the top of the head.
Arms
With Color A, make a magic circle or adjustable ring
Round 1: Make 6 SC in magic circle (6 St).
Round 2: SC twice in each stitch (12 St).
Round 3: *SC twice in next stitch, SC in next stitch. Repeat from * until end of round (18 St).
Round 4-13: SC in each stitch (18 St).
Round 14: *SC2Tog, SC in next stitch. Repeat from * to end of round (12 St).
Fasten off (leave a few inches of yarn for sewing). Lightly stuff the arms and attach to the sides of the body just below the collar.
Legs
With color B, make a magic circle or adjustable ring
Round 1: Make 6 SC in magic circle (6 St).
Round 2: SC twice in each stitch (12 St).
Round 3: *SC twice in next stitch, SC in next stitch. Repeat from * until end of round (18 St).
Round 4: *SC twice in next stitch, SC in next 2 stitches. Repeat from * until end of round (24 St).
Switch to Color A
Round 5: SC in each stitch (24 St).
Round 6: *SC2Tog, SC in next 2 stitches. Repeat from * to end of round (18 St).
Round 7: *SC2Tog, SC in next stitch. Repeat from * to end of round (12 St).
Stuff the foot with poly-fil.
Round 8-11: SC in each stitch (12 St).
Fasten off (leave a few inches of yarn for sewing). Attach legs evenly spaced 3 rows up from bottom of body.
Tail
With color B, make a magic circle or adjustable ring
Round 1: Make 6 SC in magic circle (6 St).
Round 2: *SC twice in next stitch, SC in next stitch. Repeat from * until end of round (9 St).
Round 3-6: SC in each stitch (9 St).
Fasten off (leave a few inches of yarn for sewing). Attach to the back of the puppy, 6 rounds up from the bottom.
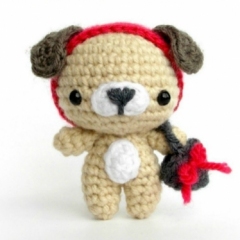
Leash
This is optional, and I would suggest that you don’t make the leash very long for safety reasons.
With color C, make a slip knot and secure to the back of the collar by using your crochet hook to pull the yarn through the two collar rows.
Chain 41, turn, and SC in each chain until you return back to beginning. Attach to the collar and pull loose end into the body of the puppy.