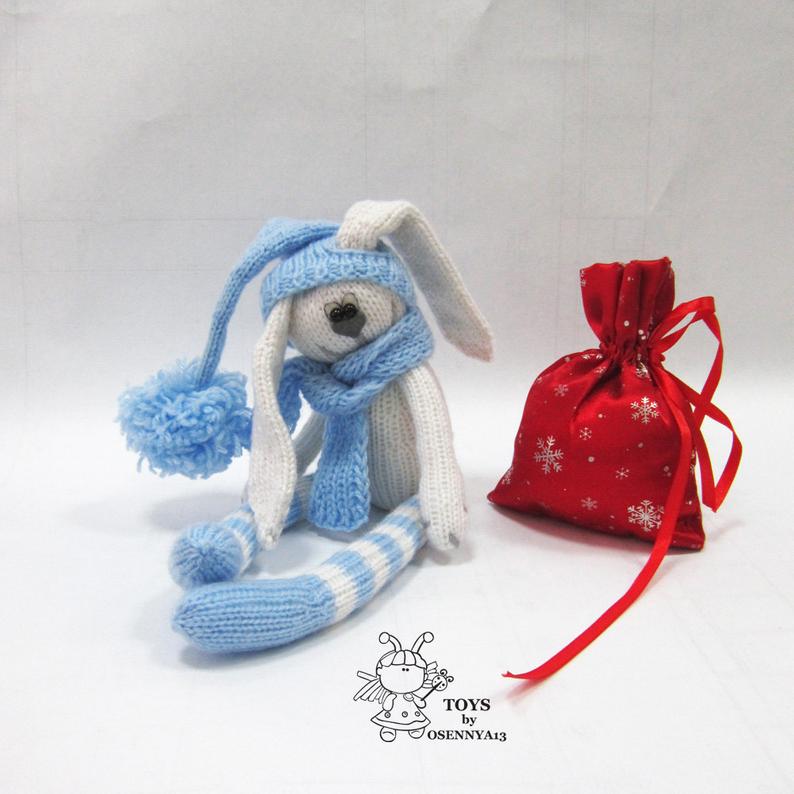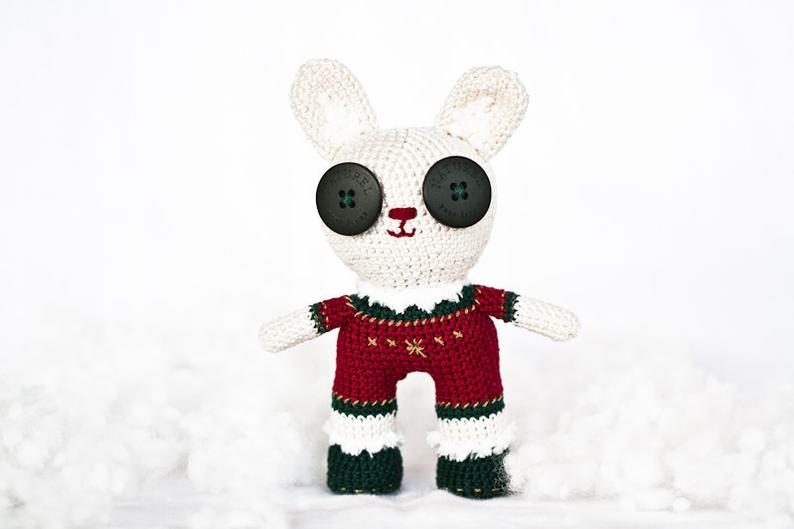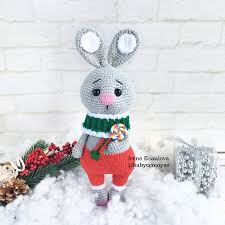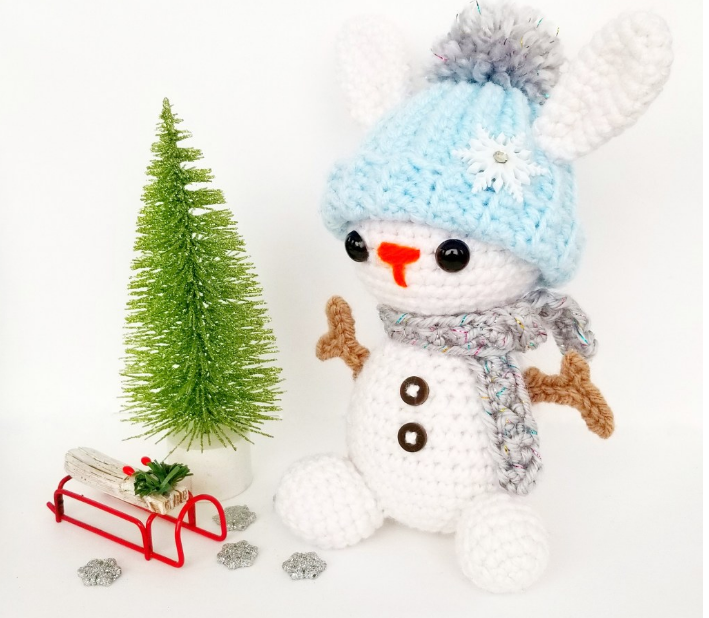
Amigurumi Snow Bunny Free Crochet Patterns
Hello dear visitors, I am here again with new amigurumi molds for you. I am sharing amigurumi patterns for you here for free. You can make your children happy by making these patterns. Amigurumi toys are very popular lately and are the most beautiful toys that don’t harm your kids. Your kids will love them. Let’s move on to our pattern and give them this gift.
designer by: thecozychipmunk
You will need
Hook: 3.5 mm
Yarn: Worsted Weight: Approx. 100 yards-White, Light Blue, Light Brown, Grey, small amount of Orange
10 mm Safety Eyes or Embroidered Eyes
Polyfill
Needle
Optional: Stitch Markers and pins, buttons
Abbreviations
MR:Magic Ring
CH:Chain
SC:Single Crochet
SL ST:Slip Stitch
BLO:Back Loop Only
INC SC:Incrase Single Crochet-Make 2 Single Crochet İnto 1 Stitch
INV DEC:Invisible Decrease
FPSC:Front Post Single Crochet
( )x…:Repeat Everything Within The Brackets
FO:Fasten Off
Notes
Magic Ring alternative if you do not feel comfortable doing a magic ring, you can also chain 2 and work the indicated number of stitches into the first chain
Continuous Rounds- each row is completed in continuous rounds unless otherwise stated
Rows- The toque and scarf for this pattern are completed in rows. The CH 1 at the beginning of each row does not count as a stitch
Front Post Single Crochet. To complete this stitch, you work around the post of the stitch below instead of under the two loops. In this stitch, you insert your hook from in front of the post, around the back of the post, and out the other side. Yarn over, pull your yarn through to the front, yarn over, and pull through both loops on your hook.
Back Post Single Crochet. To complete this stitch, you work around the post of the stitch below instead of under the two loops. In this stitch, you insert your hook from behind the post, around the front of the post, and out the back side. Yarn over, pull your yarn through to the back, yarn over, and pull through both loops on your hook.
Head
In white colour yarn:
R1: 6 SC into MR (6 st)
R2:INC SC around (12 st)
R3:(SC, INC SC) X6 (18 st)
R4: (2 SC, INC SC) X6 (24 st)
R5:3 SC, INC SC) X6 (30 st)
R6:14 SC, INC SC) X6 (36 st)
R7-R13: SC around (36 st)
R14:04 SC, INV DEC) x6 (30 st)
Place 10 mm eyes between R10 &11, 5 st apart. If you wish to sew on eyelashes, do not add washers to the back of the safety eyes yet! Remove the eyes once you like their placement, using embroidery thread, sew on two or three eyelashes for each eye, starting where the safety eyes will go and out on an angle. Make sure they are long enough otherwise they will be hidden by the eyes.
Reinsert the eyes and add washers to the back.
Using orange, stitch a nose, running the needle through several times horizontally, in line with the eyes, and one time vertically, 2 rows down.
R15: (3 SC, INV DEC) x6 (24 st)
Start stuffing, making sure to stuff VERY firmly
R16:(2 SC, INV DEC) x6 (18 st)
R17:(SC, INV DEC) x6 (12 st)
FO, and finish stuffing. Leave a long piece of yarn for sewing on later.
Body
In white colour yarn:
R1: 6 SC into MR (6 st)
R2: INC SC around (12 st)
R3:(SC, INC SC) x6 (18 st)
R4: (2 SC, INC SC) x6 (24 st)
R5:3SC, INC SC) X6 (30 st)
R6:4 SC, INC SC) x6 (36 st)
R7-R11: SC around (36 st)
R12:4 SC, INV DEC) x6 (30 st)
R13: SC around (30 st)
R14:3 SC, INV DEC) X6 (24 st)
R15: SC around (24 st)
R16:(2 SC, INV DEC) x6 (18 st)
R16:(2 SC, INV DEC) x6 (18 st)
R17: SC around (18 st)
Start to stuff the body, making sure to stuff firmly.
R18:(SC, INV DEC) x6 (12 st)
R19: SC around (12 st)
FO, weaving in ends.
Buttons
If you would like the add buttons to the front of your Snow Bunny, you can sew on actual buttons or use a small amount of black yarn and sew on small lines!
Now, sew the head and body together, weaving in the ends.
Arms (make 2)
CH 6, SL ST into the 2nd and 3rd CH from hook. This forms the first branch of your arm. (see picture 1)
CH4, SL ST in the 2nd, 3rd and 4th CH from hook. This forms the second branch of your arm.
SL ST into the same CH as where you finished the base of the first branch (see picture 2), followed by the final 3 CH. (see picture 3)
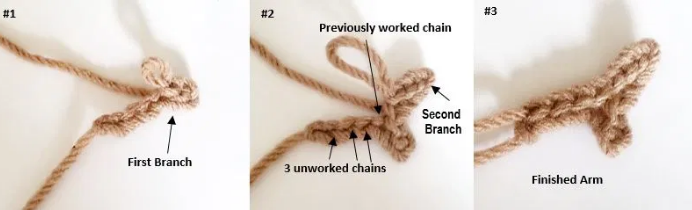
Finish off. Pin arms to each side of your snowman body and sew in place, weaving in the ends.
Legs (make 2)
In white colour yarn:
R1:5 SC into MR (5 st)
R2: INC SC around (10 st)
R3:(SC, INC SC) X5 (15 st)
R4-7: SC around (15 st)
Begin stuffing, making sure to stuff firmly.
R8:(SC, INV DEC) X5 (10 st)
FO, leaving long tail for sewing. Pin legs to the front of the body in a position that will help the bunny stay upright. I pinned mine between rounds 4-7. Sew in place and weave in ends.
Tail
In white colour:
R1:4 SC in MR (4 st)
R2: INC SC X4 (8 st)
R3:03 SC, INC SC) x2 (10 st)
R4: SC around (10 st)
SL ST to first stitch of previous round and FO, leaving long tail for sewing. Put in a bit of stuffing if necessary and pin to back of body so it is positioned in a way that supports it sitting up (a few rows up from the base) and sew to the body. Weave in ends.
Winter Hat
This is worked in ROWS. CH 1 does not count as a stitch
In blue colour yarn:
R1: CH 18, SC into 2nd CH from hook and across remaining CH (17 st)
R2:CH 1, turn. In the BLO, SC across (17 st)
Repeat R2 until it is long enough to wrap snuggly around the head of your bunny (I needed 30 rows for my toque to wrap around)
FO, and fold the rectangle in half, so that the last row of SC lines up with your starting chain. Wip stitch across through the starting chain and loop from your final row that is closest to the chain.
Your rectangle should now form a tube. On the end where you finished wip stitching, start working around the open top, working your needle in and out through the top edge, pulling as you work around to close the top. Once you have made it all the way around the top and your toque is cinched closed, run your needle a few times through the top so that the toque is securely fastened shut and weave in your ends. Flip your toque inside out to hide your work.
Optional Pom
In grey colour yarn:
Wrap your yarn around two fingers, 25-30 times and tie tightly together with a long piece of yarn. Using scissors (the sharper the better!) trim your pom to a size that you like. Attach to a needle and sew through the top of the toque, weaving in the ends.
Attaching the Winter Hat
You can now attach the toque to the head of your bunny. With the rim of the toque folded down, thread a needle with yarn the same colour as the head and sew to the head, about half an inch up from the base of the winter hat. Work around one or two times, so that it is firmly sewn to the head. Weave in ends.
Ears (make 2)
In white colour yarn:
R1:5 SC into MR (5 st)
R2: INC SC around (10 st)
R3: (4 SC, INC SC) x2 (12 st)
R4-R6: SC around (12 st)
R7:04 SC, INV DEC) X2 (10 st)
R8-R11: SC around (10 st)
FO, leaving a long tail for sewing. Flatten ears and pinch base in half, sewing back and forth a few times. Pin ears to the head and sew in place, making sure to work the stitches through both the winter hat and head so that it is firmly attached. Weave in ends.
Scarf
The scarf is worked in rows. CH 1 does not count as a stitch.
In white colour yarn:
R1: CH 51 (or until the chain is a length that you like), and SC in the 2nd CH from the hook, and each CH across (50 st)
R2: CH 1, turn. (FPSC, BPSC) x25 (50 st)
FO and weave in ends. Tie the scarf around the neck of your Snow Bunny!